Finally, another update! And it’s a doozy!!
Since the last post was about procurement and the various challenges working with suppliers, now it’s time to show how it all started coming together!
Cabinetry
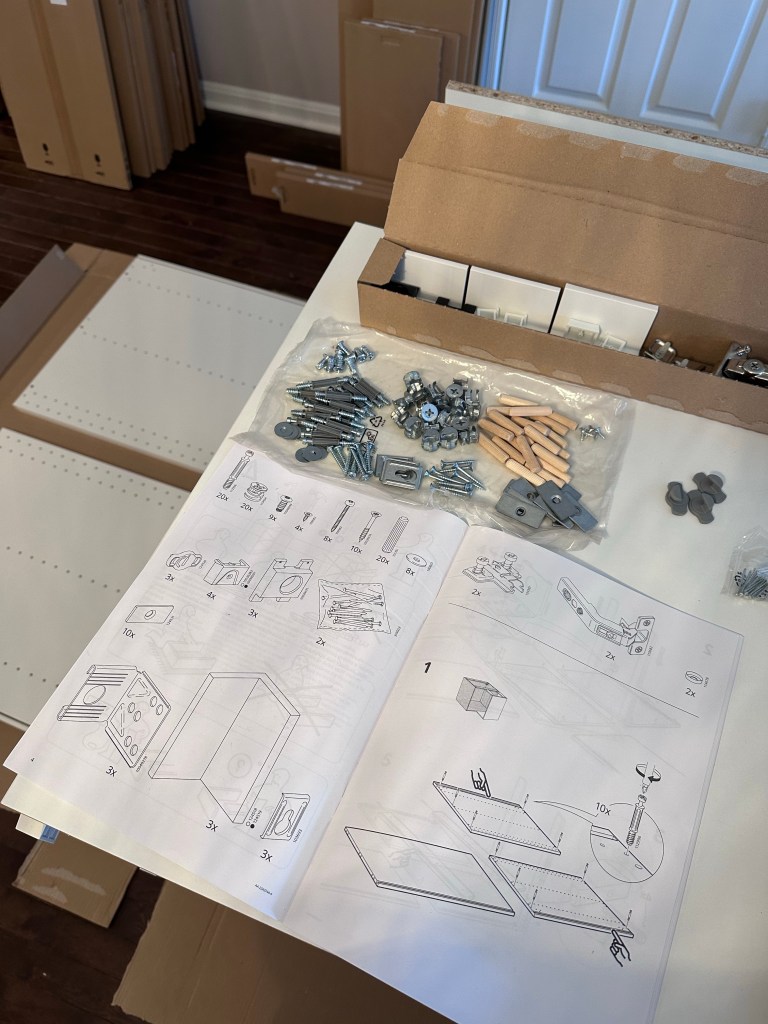
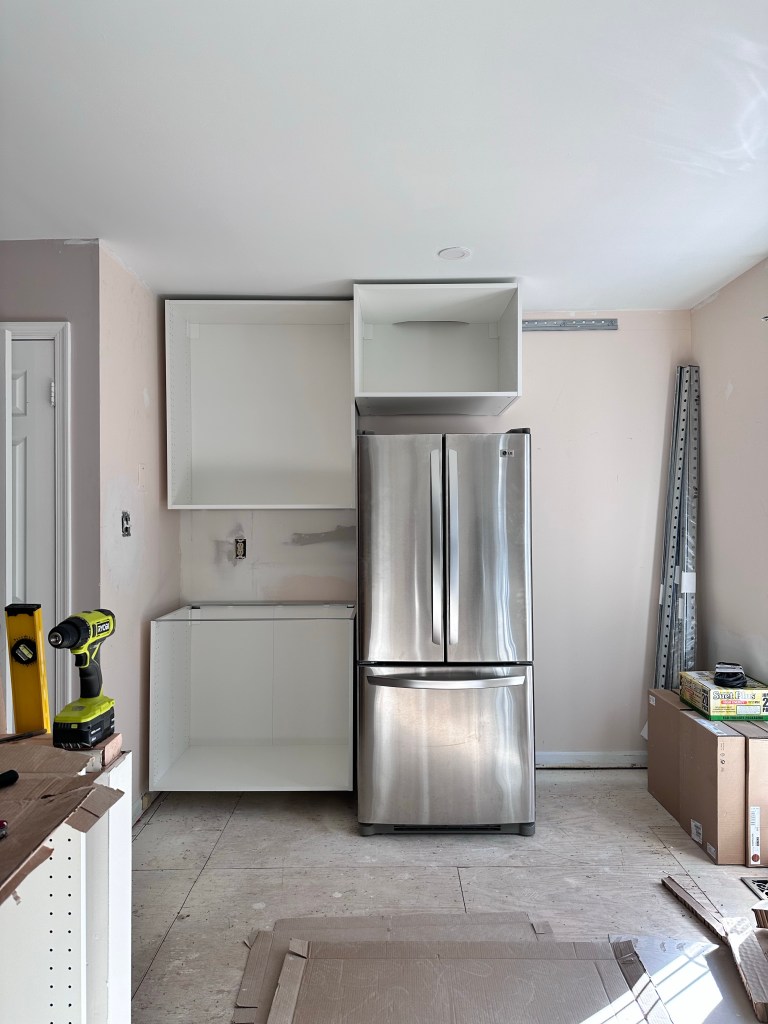
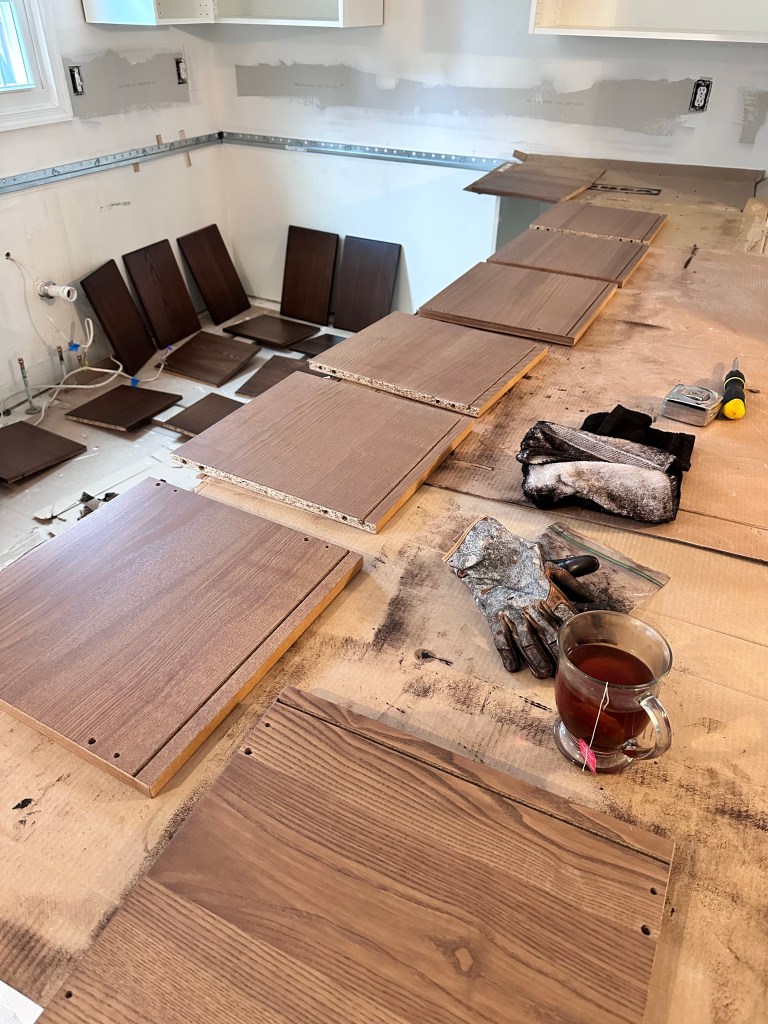
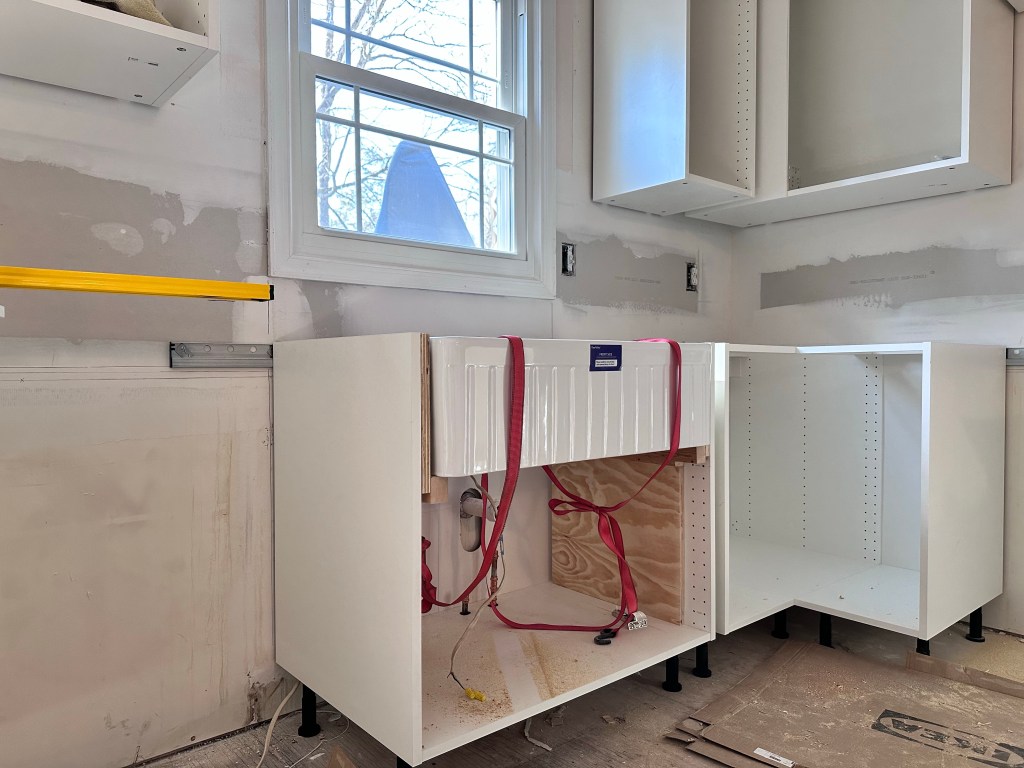
All the cabinetry is IKEA, so they came flat-packed and needing assembly.

One of the nice things about the IKEA (“Sektion”) cabinets is that the boxes are all the same, it’s just the door and drawer fronts, as well as cover panels and trim, that have different colors and finishes. You can also order custom fronts and trim from third-party sites that are typically nicer; I briefly considered it but there were nice-enough options at IKEA for much less, so I stuck with that.
After landing on the white shaker-style fronts with the faux bois texture and *finally* getting all the necessary pieces, it was time to start building!
… which was difficult to do as unassembled cabinets take up a lot of space.
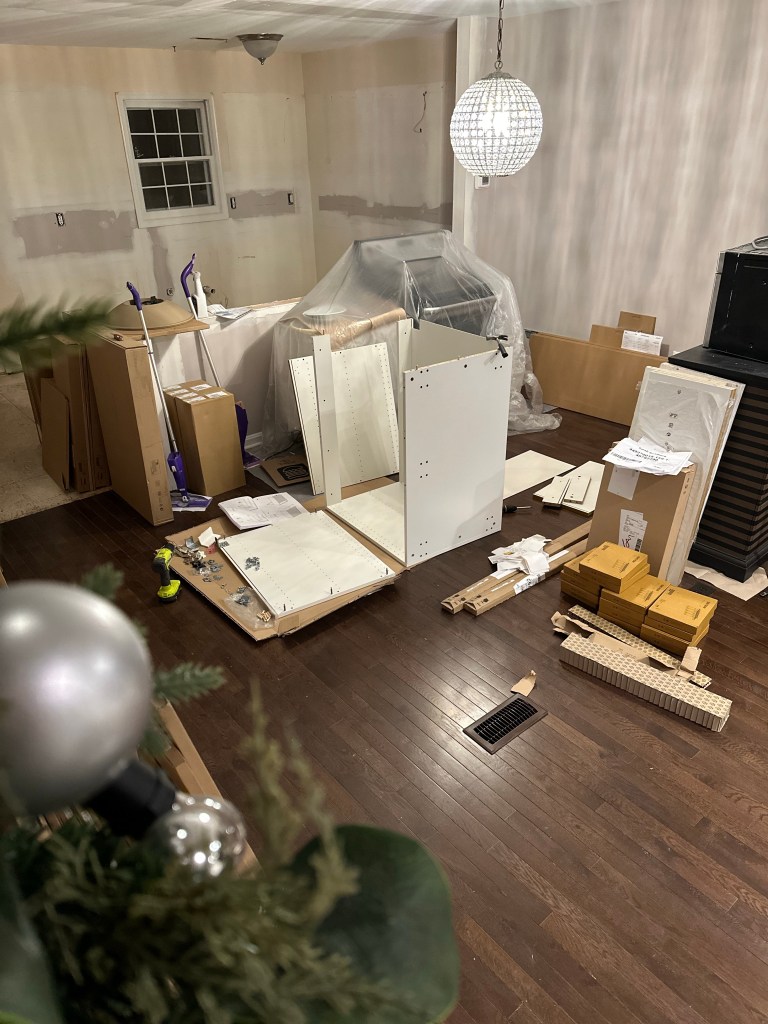
But otherwise, it was about the same as assembling anything else from IKEA.
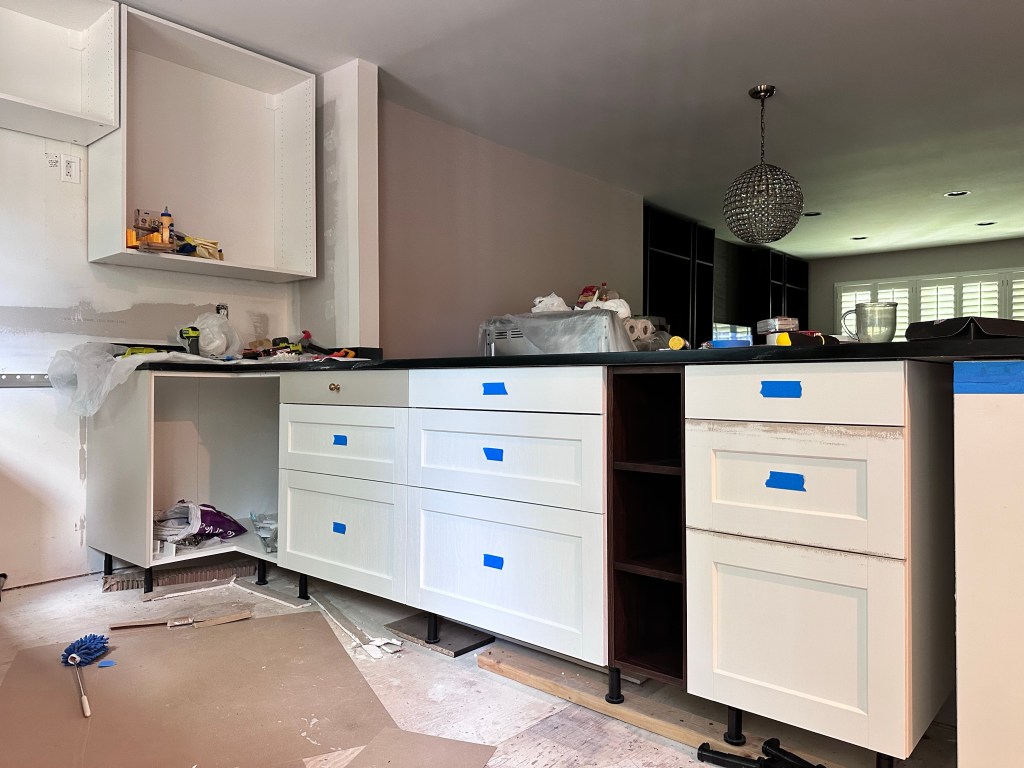
After that, the boxes needed to be mounted – IKEA does use a unique approach in that, instead of holding a cabinet box up and level with one hand and screwing hopefully into a stud with the other, you just hang mounting rails at the appropriate heights everywhere the cabinets go, and the cabinets hang off those – so they’re always level, flush, and secure, and you can also scoot them left or right a bit along the rail until they’re locked into place.
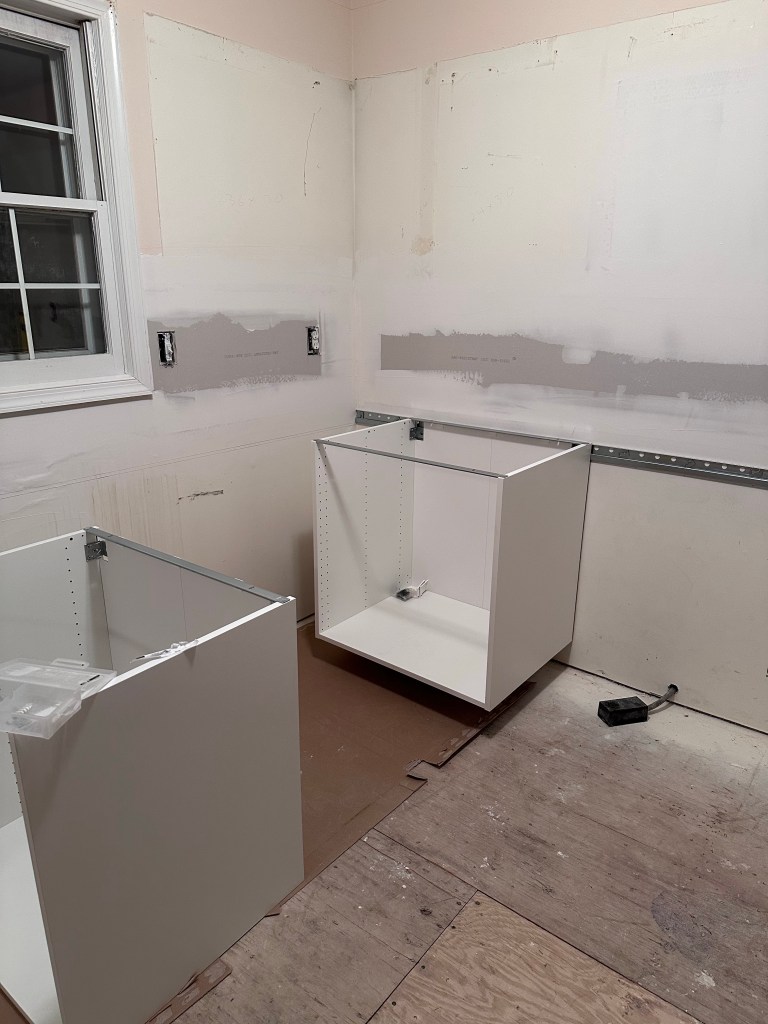
(The mounting rails are supposedly “easy” to cut, as long as you have a reciprocating saw with a carbide blade, something to hold the 8’ steel rail steady while you try to power saw through it, and neighbors who don’t mind a lot of noise.)
It took a few days to get all the rails cut to length and mounted level at the right height, especially because my floors are far enough out of level that I didn’t want to mount the rails for the base cabinets at the correct height in one spot, and then have them be too short in another!
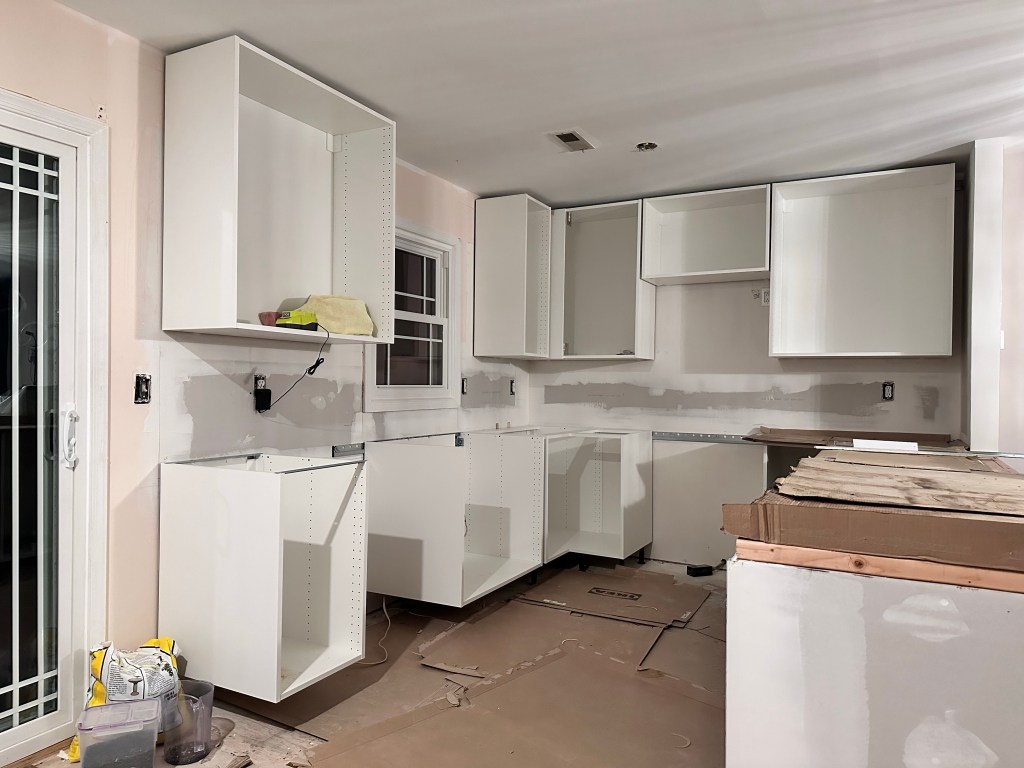
But, once those are set, you just need some helpful family members to come help you mount the cabinets! And then, the kitchen starts taking shape:
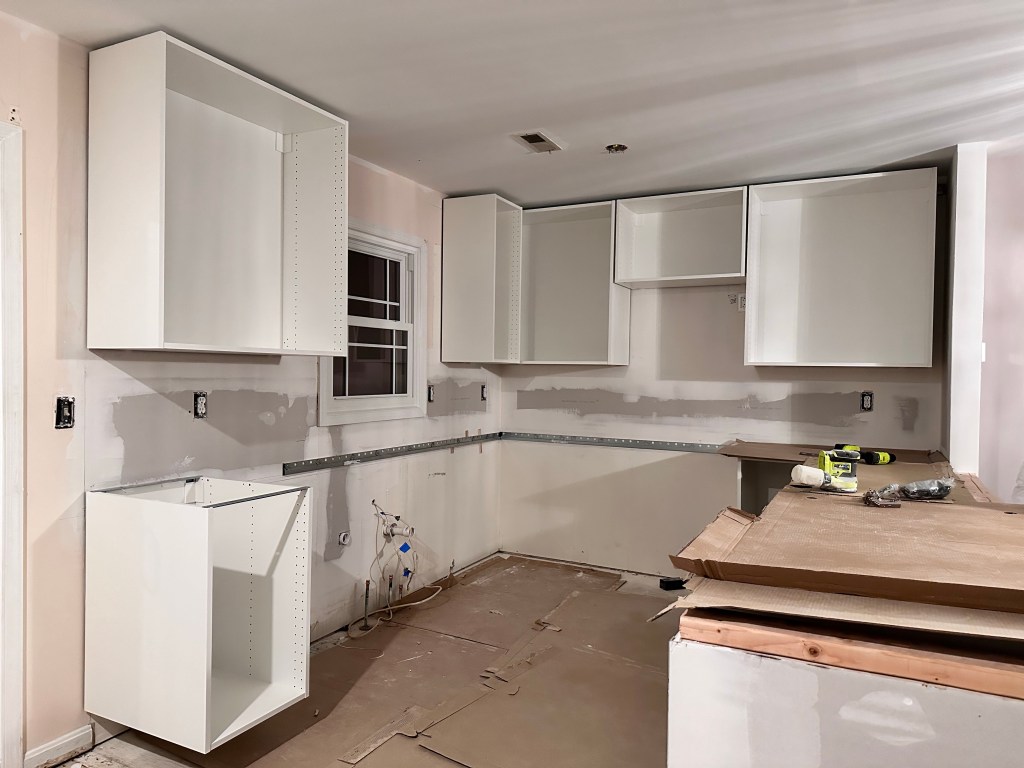

The detailed layouts I got from my kitchen design reviewer were helpful here to make sure I left spaces for cover panels and had cabinets the correct distance from the walls. But once the cabinets have their little feet and are locked on the mounting rails … that’s pretty much it for the boxes (or carcasses, as they’re sometimes called lol).
Oh and once all the boxes were mounted, I used a couple remnant flat-pack boxes to make a makeshift countertop!
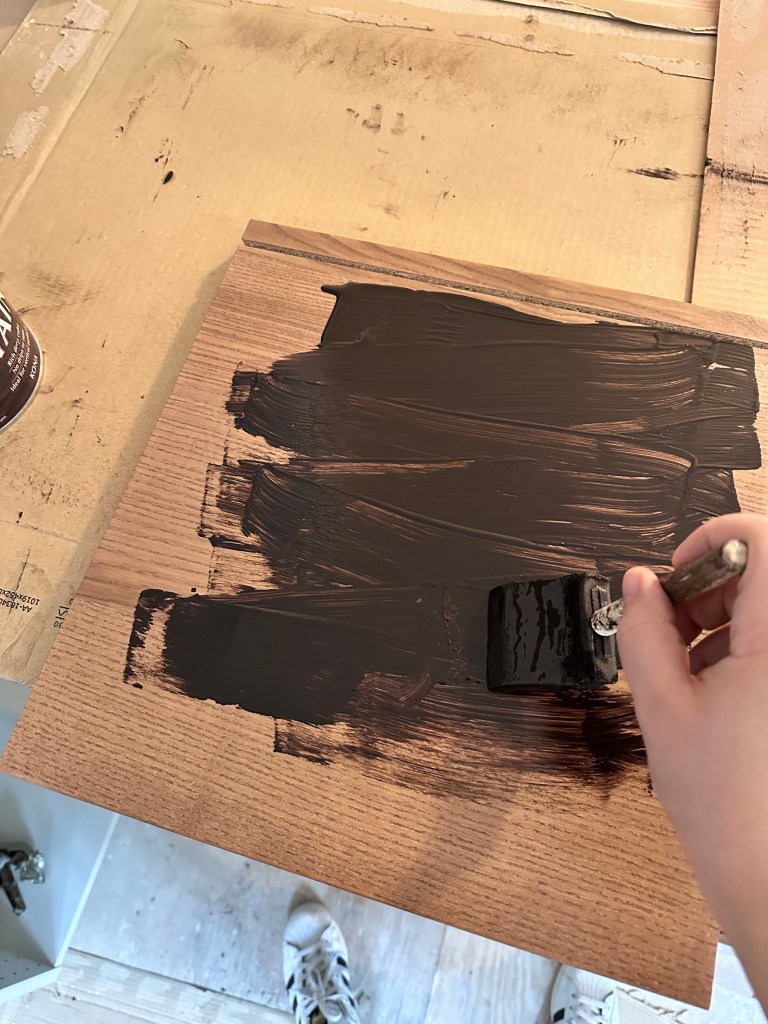
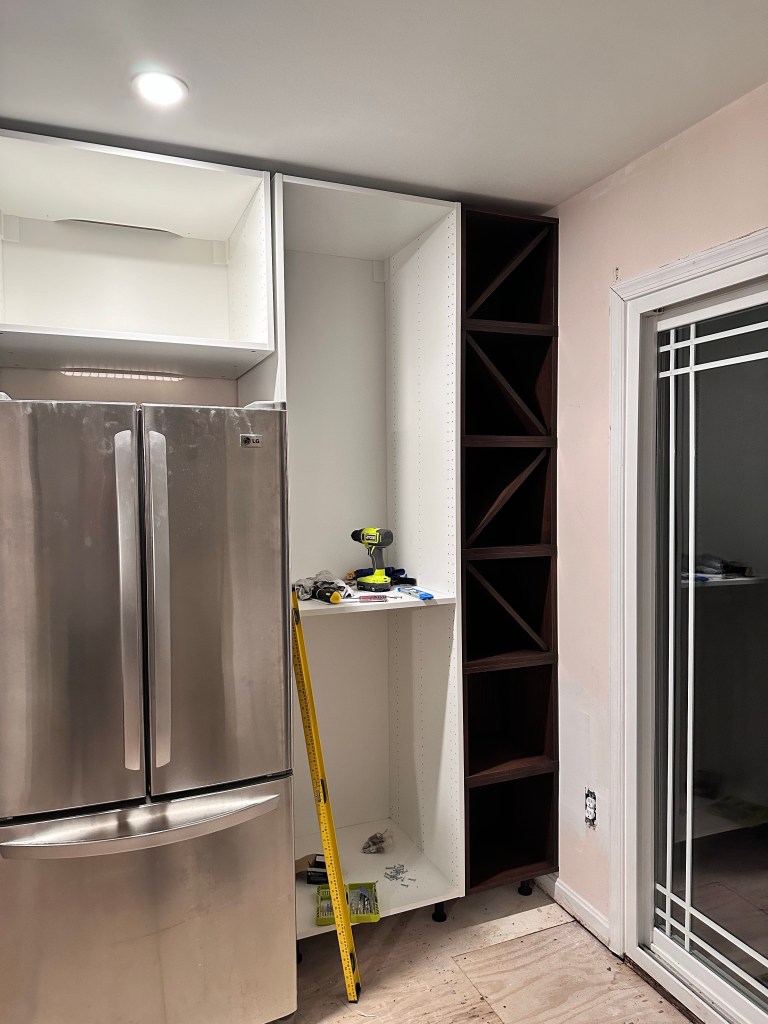
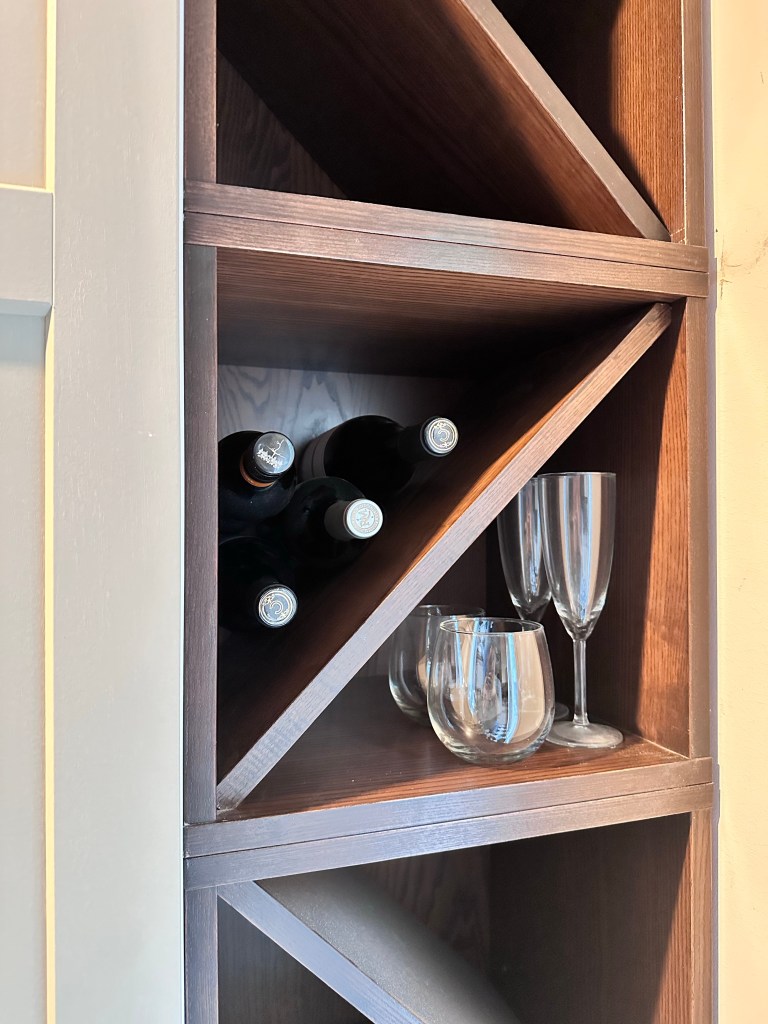
With the main cabinets in, I could move on to my beverage cubbies –
Since the wood tone they came in didn’t match anything else, I bought some of this miracle product and ran some tests for how to apply it and how to get a color I liked:
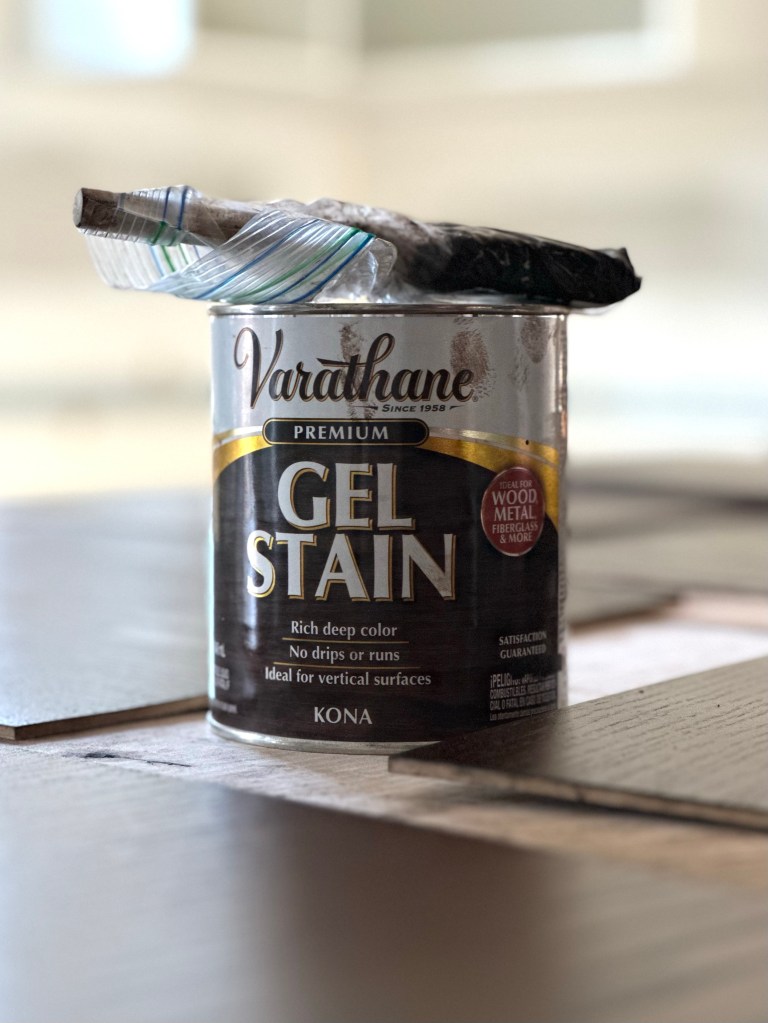

Ultimately, I got something pretty close to my hardwood floor color by a coat of the gel stain, leaving that on for ~20 minutes and then wiping thoroughly, and then two coats of satin-finish top coat.
Each cubby has four sides and a back panel that need to be finished on one side, plus a shelf that needs to be finished on two sides. For six cubbies. It was a lot of coats on a lot of sides.

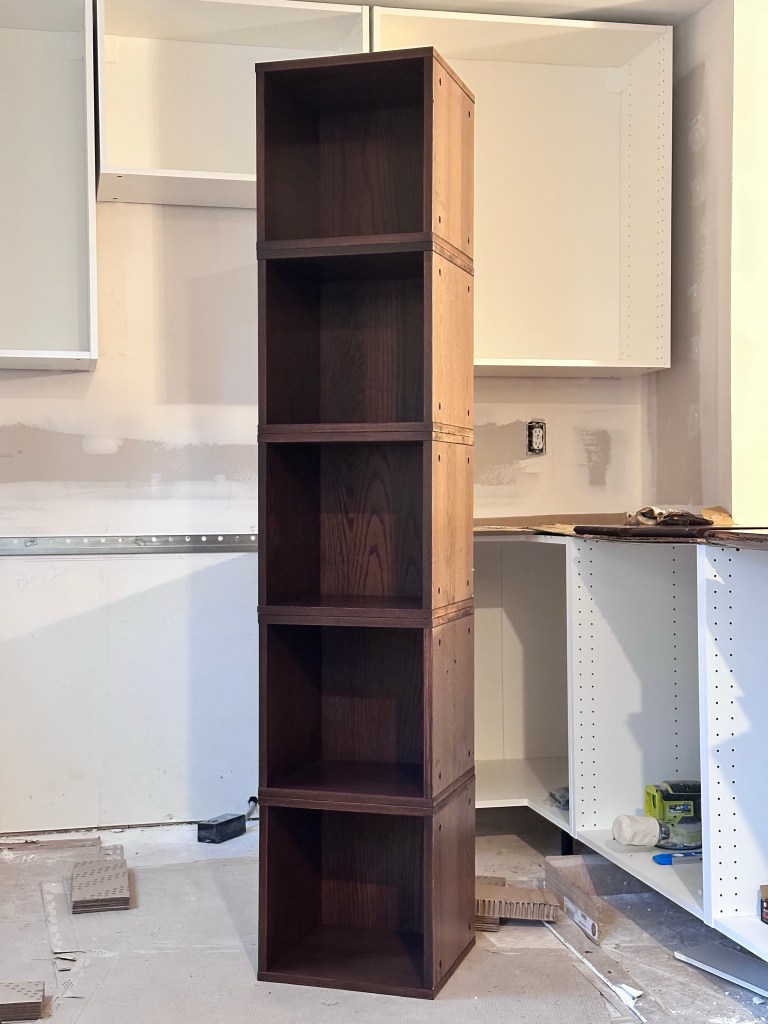
I also bought a tiny bookshelf version in the same finish as well. And, not only did I mess up the finish in the first one and have to buy another, I actually very confidently bought the wrong size replacement for the second one, and had to traipse all the way back to exchange it (thank you, IKEA, for taking opened returns!). But I figured it out eventually and refinished that, too!
(Those boxes aren’t as deep as the cabs so they don’t hang on the same mounting rail – they just need to be clamped / shimmed and screwed thoroughly into their neighbors.) But again, relatively easy to assemble.)
And I love them! It was nice adding a natural (ish) element to the design, and doing something a little more custom and unique.
Here’s a little sneak-peek of when I got excited and started loading them up:
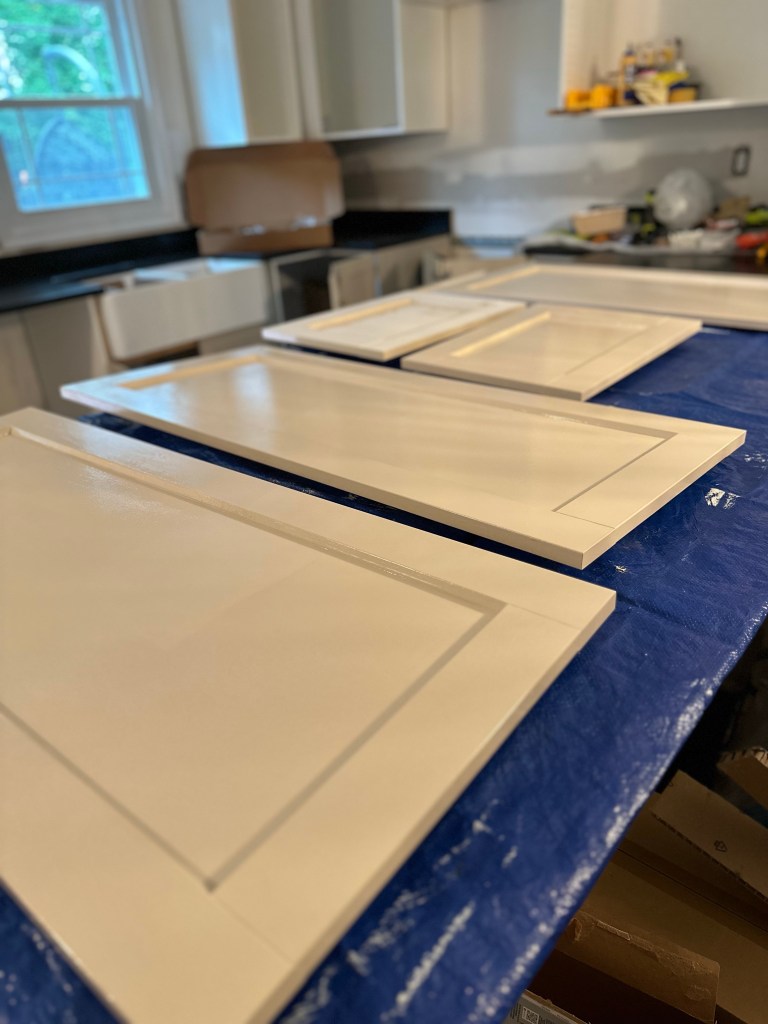
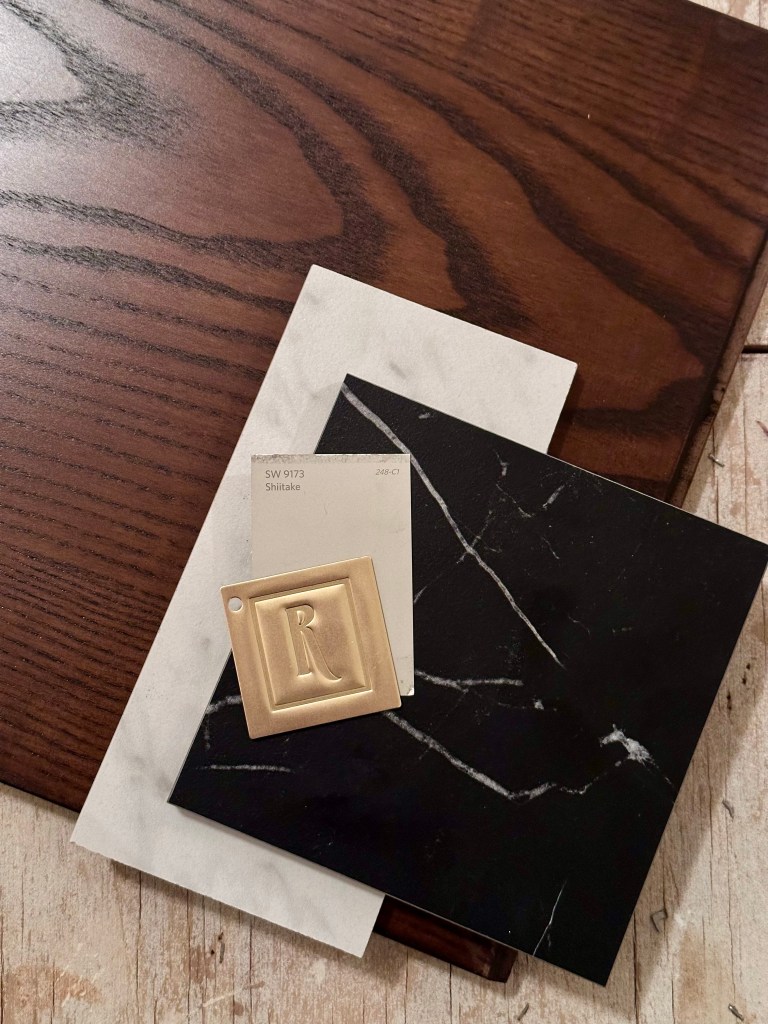
The last phase of the cabinets was refinishing – since they were white and I definitely didn’t want that, I restocked on my Zinsser BIN shellac primer and picked up some Sherwin Williams enamel trim paint in my chosen cabinetry color, Shiitake – and for this it was two coats of each, on two sides of each piece. For A LOT of pieces (and I only had room to lay out about 8-10 at a time), including a few glass doors that needed to be carefully taped-off first. And that was just the doors, drawers, and cover panels; it didn’t include the filler panels, trim, and toe kicks, which will need to be done later.
That paragraph was quick to write and belies the weeks and weeks I spent refinishing! Ugh –
But, once I could start attaching them to the cabinets, the color looked so perfect in the space and the wood pattern still came through, so I was really glad I did it. Again, nice to get to pick a custom finish instead of having to go with whatever IKEA happens to be offering at the time.
The last last step on the cabinets was hardware. I thought this would be easy, but it turned out to be actually really tricky – the Moen faucet that I got obsessed with was a lot more coppery than most “brass” or “gold” options around these days, so any other hardware I tried, including the Rejuvenation knobs I initially wanted, were not just slightly, but like *way* off. One alternative would have been to just not try to match it and go with a black finish, but … I just really wanted that pretty goldy, coppery brass.
I did eventually figure out that Moen actually sells matching hardware for the faucet, both in style and color, so although it was slightly pricier – about $25/knob vs about $20 if I had gotten Rejuvenation – they seemed like good quality and got me what I wanted. Plus, I was able to get them on Amazon with a little volume-discount promotion, as well as 5% cash back on my card! Basically made money on the deal!
And we’ll circle-back to that awesome faucet shortly –
The Sink to End All Sinks
A farmhouse sink, to be exact! To install a farmhouse sink, you need a sink cabinet with two sides, a back, and a bottom, and that’s it, and then you custom-frame the support to hold the sink up so it’s a) slightly forward, b) an 1/8″ below where the countertops will sit, c) got room for the drain pipe(s) to come out the bottom, d) got room for the door hinges, and e) able to support much more weight than just the sink itself.
As such, this was more a DIY project for my parents, who happen to be much smarter at math and engineering than I am –
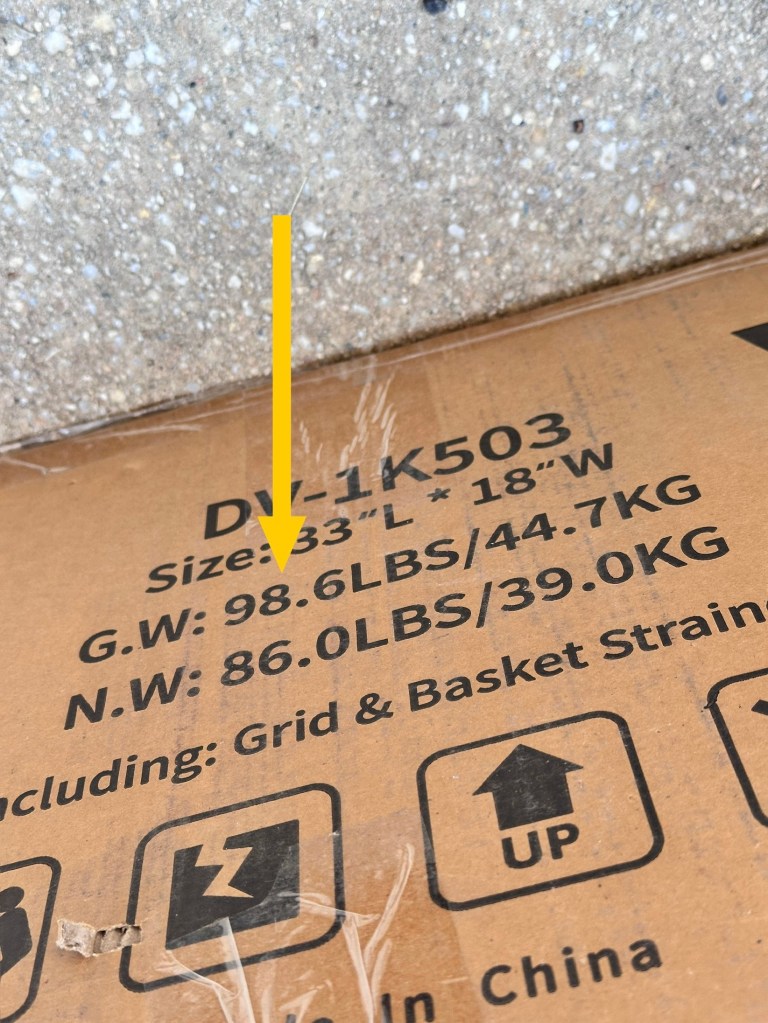
Once the frame was built out and installed, the sink itself weighed about 100lbs so had to be lifted carefully, and then shimmed to be centered in the cabinet. Then, it sits there exactly where I want it until the countertop people come through and measure, then come back and install. And we know how well that went but at least the sink was behaving itself!
My dad also had the nice idea to leave the sink sitting “loose” on the framing / under the counters until the faucet was in – since the sink has to be in before the counters, and the counters have to be in before the faucet, you end up with a very narrow space behind the sink to reach under and up to secure the underside of the faucet, so being able to slide the sink out to make a little more room would have been helpful. But, the countertop guys siliconed it in place and that was that.
But luckily for me, I didn’t do the plumbing on this one anyway – my contractor and his crew came back to fit the new copper and PVC piping under the sink, and install the faucet.
So speaking of the faucet, it was actually one of the first things I settled on for the kitchen – with the wall between the kitchen and dining rooms removed, you can now see all the way to the kitchen from the front door of the house, and I wanted the faucet to *sparkle* and draw the eye all the way in.
I forgot where I found this, but I liked the classic shape and the cute little ceramic button on the lever:
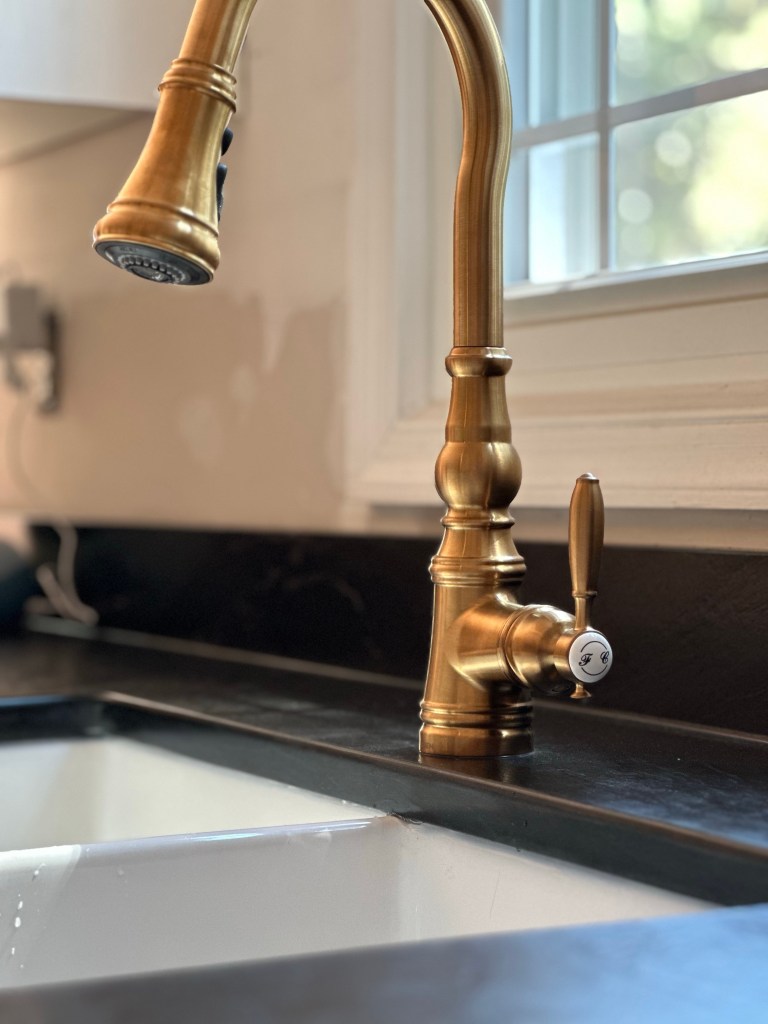
And even cuter, it comes with both a “H/C” option and a “F/C” option! Can’t wait for a future owner of this house to notice that one day and wonder what “F’ stands for and why the “C” side comes out hot. Also, you have to imagine the theme for 2001: A Space Odyssey playing in the background of this picture.
Floors
After spending any amount of time walking around on raw sub-floor, I was super excited to get started on the tile. But, after getting shut-down on my first-choice cheap vinyl, it took me a while to figure out what I wanted to do instead … I ordered a bunch of options in a range of prices, and looked around at Home Depot, Floor & Decor, and my contractor’s flooring store. I still really wanted black-and-white checkerboard, but anything I found that I liked was expensive. Here’s a small selection of all the floor samples I collected for this project:
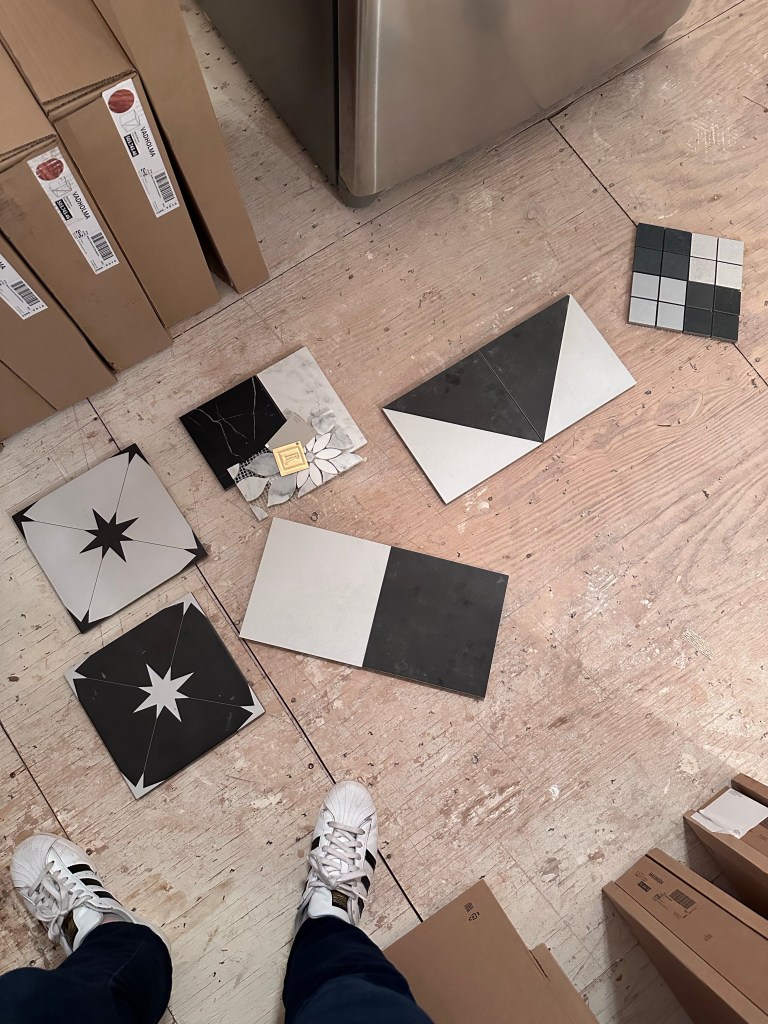
I also found this option at Floor & Decor, which was probably my favorite for the little unique touch of the triangle tiles:
But, it was “basalt and dolomite”, and priced-out at about $8,000 – since the budget for the whole house is $50,000, that’s quite a chunk just for ~150sqft of flooring. Ultimately, I settled on a 6″ porcelain tile from tilebar.com that came in both black and white colors, which priced out at more like $1,500. And since 6″ was smaller than I wanted my checkerboard squares, I took inspiration from the marble and dolomite triangles and decided to do four tiles per square, rather than just one.
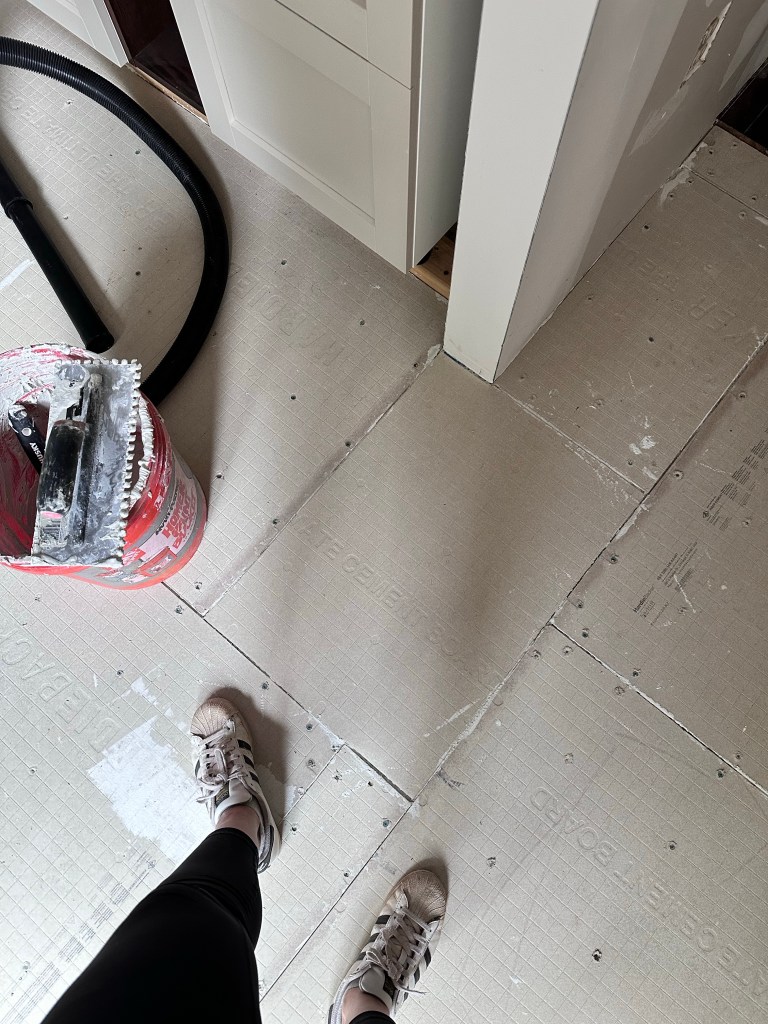
But now, back up because we’re not to tiling yet – first, the sub-floor had to be prepared! Upon doing some research, I ordered a bunch of HardieBacker concrete board (thank you, Home Depot delivery, because boards made of concrete are apparently very heavy, and also don’t fit in my tiny car) – but as I was getting ready to just start screwing the boards down using the drywall screws I had on-hand, and then thought better of it and watched an install video first, I learned that it’s actually a very involved process. Firstly, laying out the boards and cutting to-size with a utility knife so there’s an 1/8″ gap all around. Then, mortaring the boards down with thinset (which by the way, comes in a 50lb bag that has to be mixed with water and is super messy, and you need a special $20 mix-y drill attachment thing and a corded power drill because battery-operated isn’t strong enough, and then a second corded power drill when you burn the first one out). Then, screwing the boards down with special concrete board screws, while also not standing on the boards because you don’t want to squish them out of place or out of level. And finally, mudding and taping the seams with more thinset and a special weird type of mesh tape. The mudding and taping part was actually kind of fun and satisfying, but the rest of it was hard work! And oddly it all had to wait until the sink was plumbed because for some reason the backyard garden hose supply runs off the kitchen tap supply, so I couldn’t mix any thinset out back with the kitchen water disconnected.
But finally, the floors were ready for tile! The most important part here was thinking carefully about the layout – when I was playing with my vinyl tiles, I decided I wanted a row of white diamonds to line up with the center of the sliding doors. Here’s what it looked like when they weren’t lined up:

And, once I finalized the kitchen layout and got the cabinets up, the stove was centered on the right-side wall, and the fridge was centered on the left-side wall (although actually, it’s off by about 0.5″, but who’s counting?), so I wanted to center the diamonds going across the kitchen on both of those elements. Since I wanted mostly black tile along the base of the cabinets, I laid it out and determined it should be a black row centered on the stove and fridge. Then, it was just a matter of very carefully measuring and drawing the ‘X’ in the center of the room to start the tiles on.
By this point, I was tired of the hassle of mixing thinset, so decided to try pre-mixed – it’s several times more expensive by finished volume (~$100 to cover this area vs ~$20), but … I wasn’t getting coated in concrete powder while burning out a power tool standing in the sweltering summer heat and humidity multiple times per day, so that’s worth something.
TIME TO TILE!
Nice – a lil’ dance floor! I would just go stand on it every so often just to enjoy the feel of real flooring under my feet. It felt good.
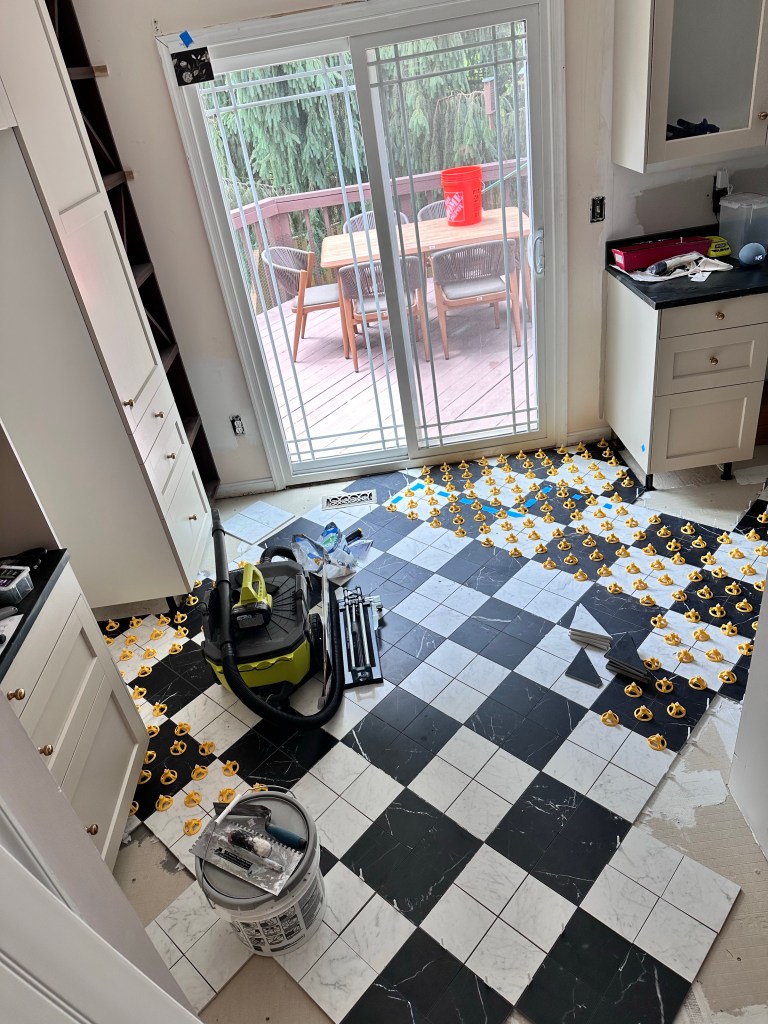
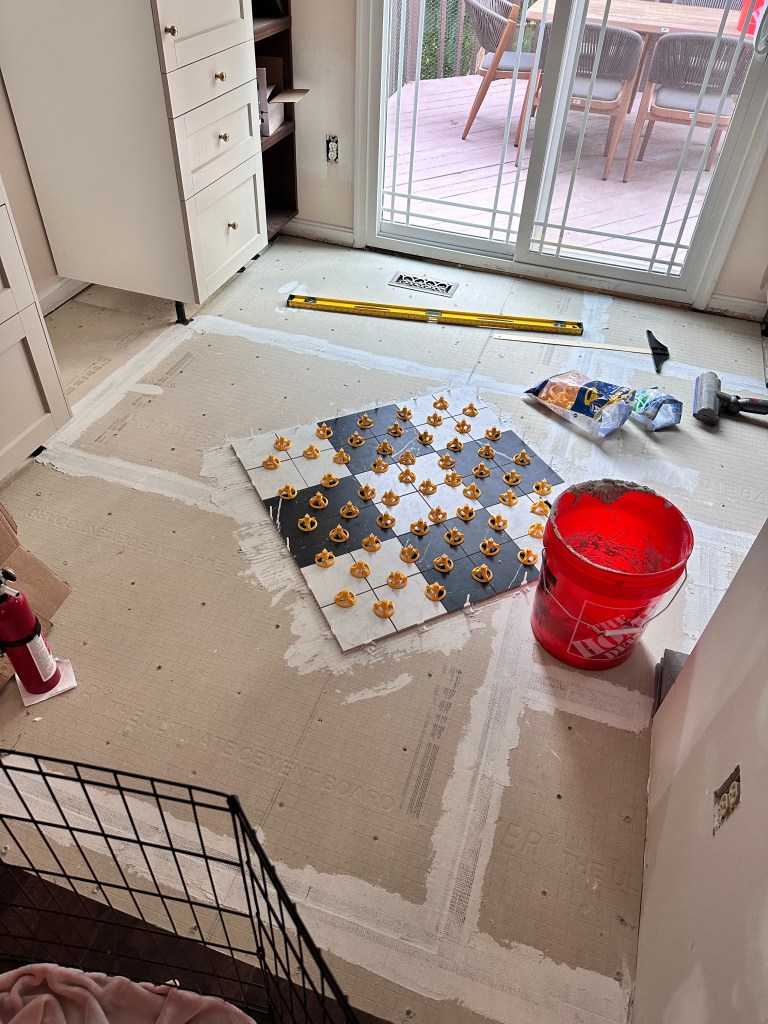
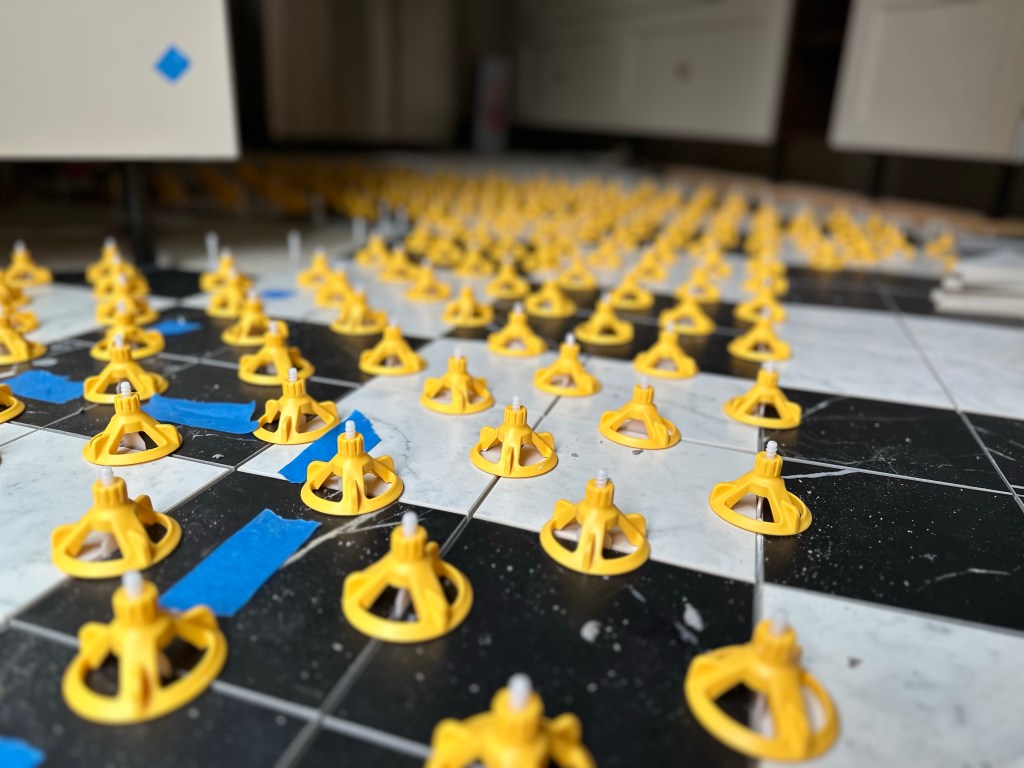
These are self-leveling tile spacers, so there’s a little foot that tucks under the side of one tile, then you lay another tile down on top of the foot on the other side, and then the little yellow cap spins down from the top and squeezes the two tiles level with each other. I didn’t end up loving this system, since tucking the footed-spacers underneath tends to squeeze up some thinset between the spacer and the edge of the tile, which then adds some width to the gap. Also, since you do have to tighten the caps, that can also squeeze up more thinset (you eventually have to chisel all the dried thinset out and risk chipping the face of the tile), and the spinning cap tends to rotate the tiles out of position. And unless you do the whole floor all at once, which I certainly did not, at some point you end up trying to level tiles you just laid in wet thinset to tiles that have already dried in-place and can’t move, which usually doesn’t work super well. Ultimately, it probably helped keep things more even than they would have been, but it wasn’t as perfect as I thought it should have been. But, they sure look cute all standing in a row!
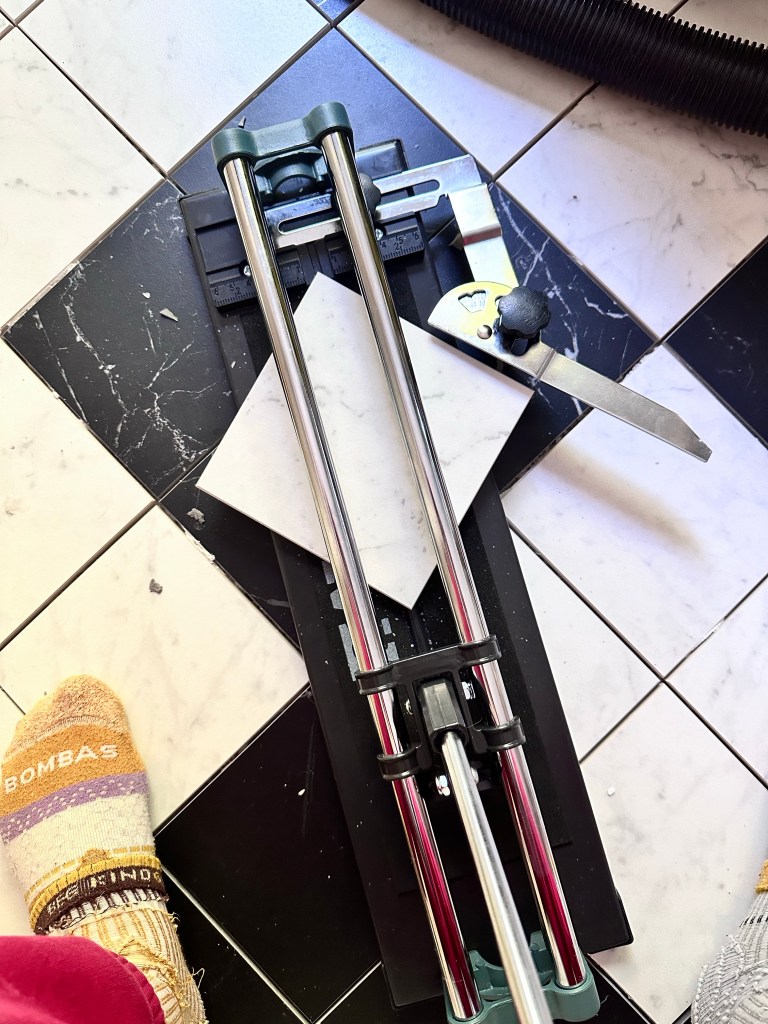
There was a bit of cutting to do as well, so I ended up purchasing a score-and-snap tile cutter (which are only about $30), as well as borrowing my parents’ wet saw (because as my Dad says, diamond-tipped saw blades are a girl’s best friend). The first was more convenient but rarely made a perfect edge, so better for the cuts that wouldn’t show; the second made perfect cuts but obviously has to be used outside and there’s a lot more setup and cleanup involved.
I thought all the floor tiling would take ~4 days.
It took 12 days, and I was very sore by the end. And still needed to grout.
Luckily, grouting was relatively easy. I originally wanted to do a medium gray that would look nice and neutral – not match the white tiles or the black tiles, just tie them all together. Once the tiles were in though, I was a little worried that my grout lines were too imperfect in some spots and so thought I wanted to try and hide them a bit. I bought some black grout (which would stand out in the ‘X’ at the center of the white squares, but blend in to the black squares) and tried it under where the refrigerator would go, but it just ended up looking really retro or something, and really discolored every time I tried to wipe it down. I definitely didn’t want white, because who wants to worry about having to keep white grout clean, so went back to the gray. I thought that looked way better and once it was all in, I didn’t notice it highlighting the uneven grout lines too much anyway.
Grouting took about another 5 days. It was also a little tricky and I’m glad I practiced in all the spots that would have appliances over them first. I was using pre-mixed grout (the same Home Depot brand as the pre-mixed thinset, since I had liked it), and it worked well but left a nasty “haze” that had to be wiped up with a damp tile sponge and then dry paper towels immediately, and even then there were (and still are) a good number of spots that still had a light (but by then, mostly cured) haze that needed to be ground off with a damp scrubby sponge and much elbow grease.
Oh, and I forgot to mention one more special piece of equipment I had to procure to help hold the floors down:

IT’S BLUEBELL!
Re-Installing the Appliances!!
NEVER try to install your own microwave! That was probably the least DIY-friendly job I experienced.
The stove was okay, though (since it’s electric, just plugs right in once you carry the beast over there from its holding area in the dining room).
As for the dishwasher – TBD, it’s still in the dining room for now.
‘Nuff said.
What’s Left
Things are looking good, and I’m definitely getting there – I’d estimate about a month left at this point, so we’ll see how accurate that turns out to be. (I think I originally estimated 3mos for the whole project, and it’s been 7mos thus far.)
Still to do:
- Install and paint beadboard
- Install and grout tile backsplash
- Touch-up cabinet, wall, and ceiling paint, and hang curtains
- Finish cabinet trim and filler pieces
- Finish the remaining electrical elements (outlets, cabinet lighting, and ceiling lighting) and replace HVAC register covers
- Move back in!
Next post will be the finishing touches, and reveal … and we’ll see how I did on budget. Thanks for reading!


Brains, beauty, and boundless work ethic! Bubbe read every word and was just as impresed as me. 😍
LikeLiked by 1 person