Demo started on December 21st, 2023, and I officially finished the kitchen on … December 21st, 2024.
Exactly one year! My original estimate was 3 months, then I wanted it done as a birthday present to myself in July, then by Labor Day, then just … within the year. And now, I sit here writing this with a view of a beautiful new kitchen that I did myself (with a bit of help, of course). So, time for one last update!
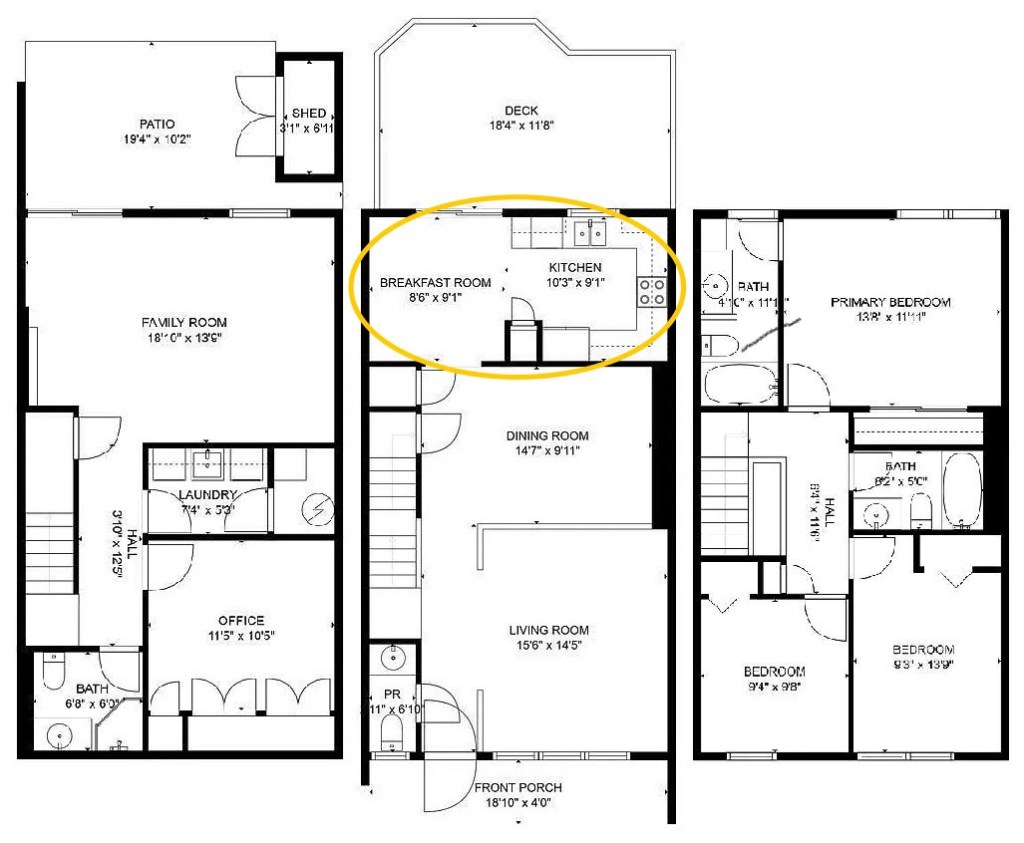
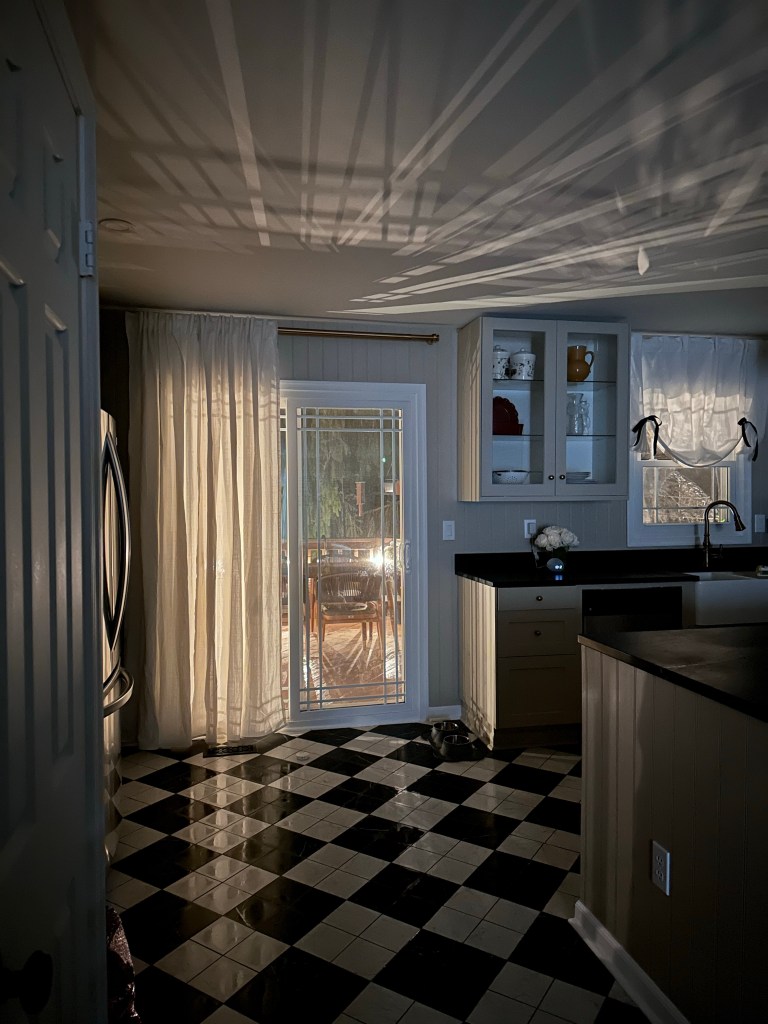
Here’s where it is, one more time:
But first, these are the final tasks I had to wrap up from last time:
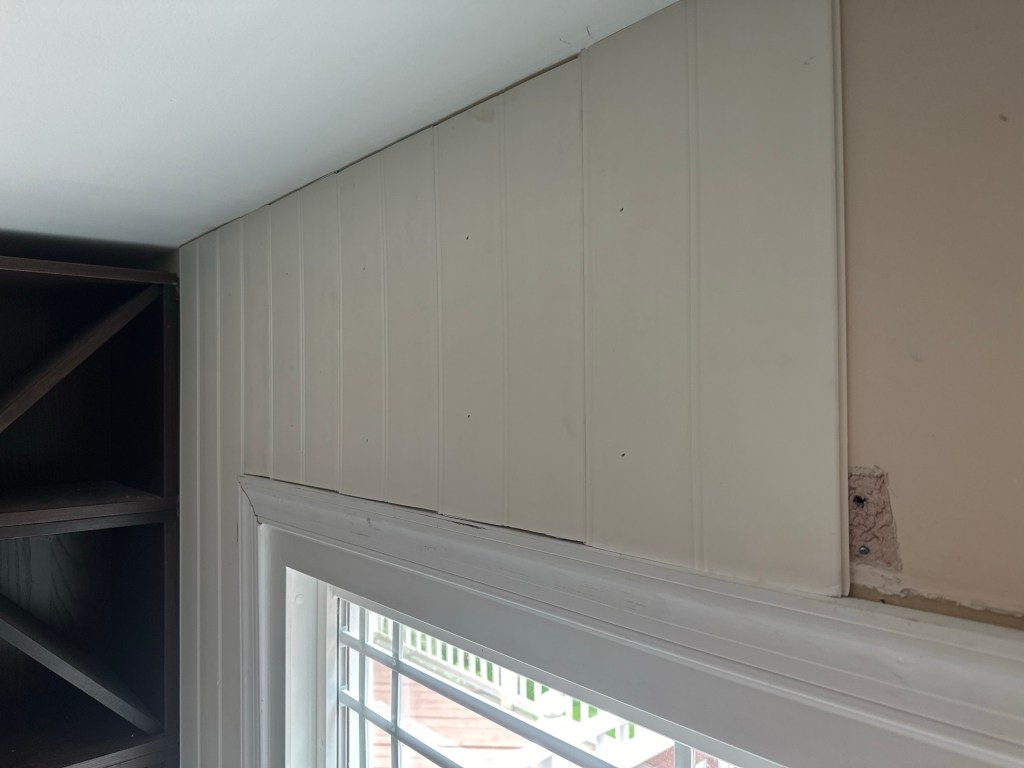
Beadboard
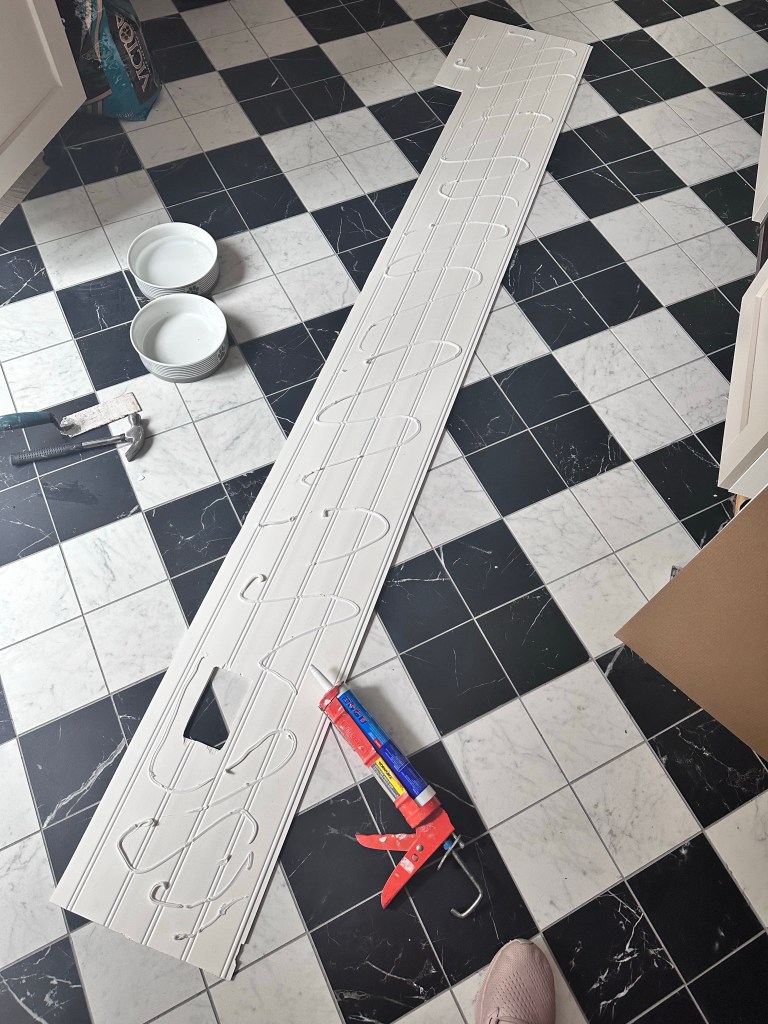
This turned out to be pretty easy – I found PVC beadboard at Home Depot that can be scored-and-snapped by a utility knife, even around the outlets and other little cutouts. It just needed to be cut, glued, and brad-nailed into place. Then, caulk and paint!
Tile Backsplash
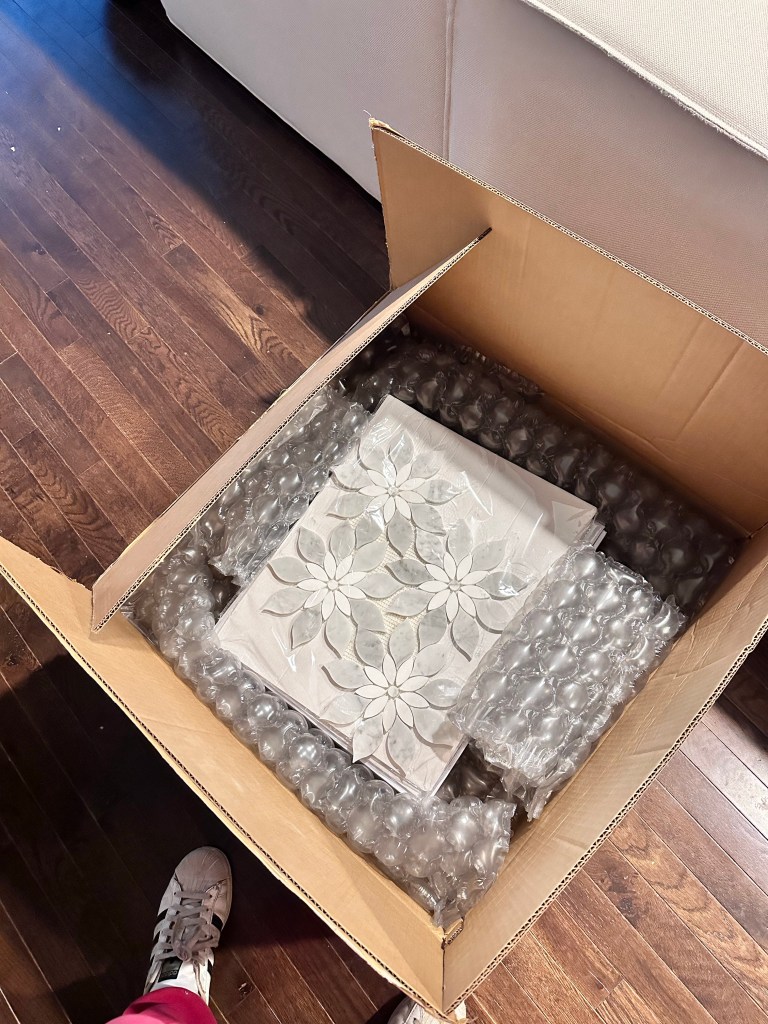
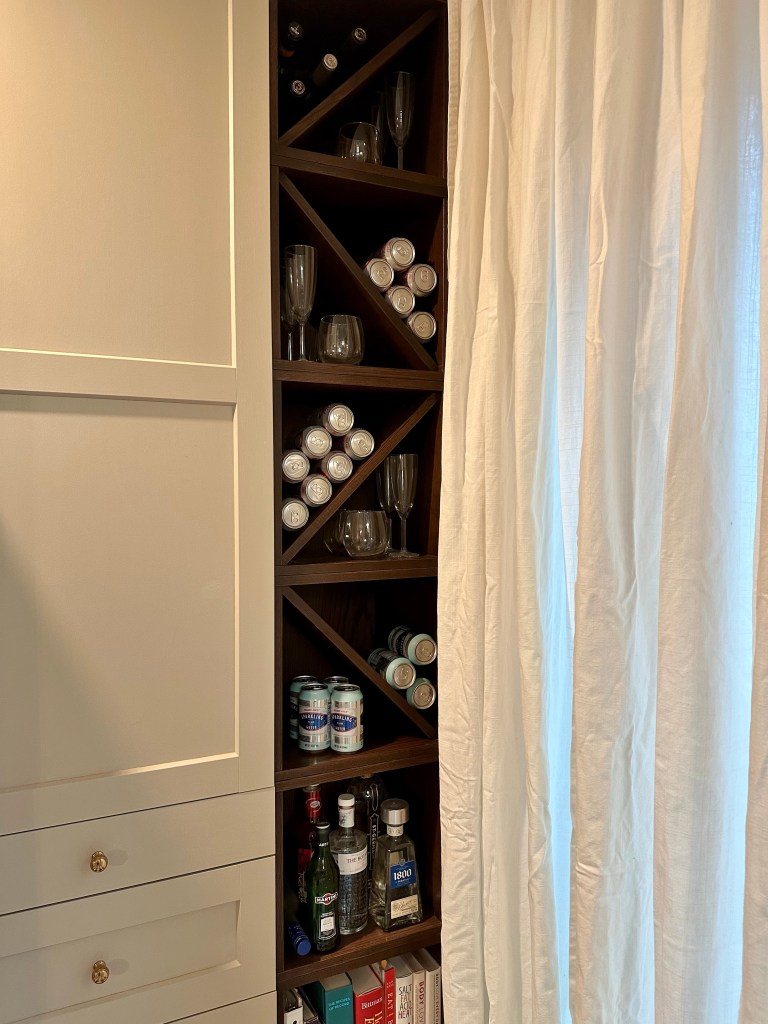
I was so excited for this one – I’ve always loved this particular marble mosaic tile (again from Home Depot), and the “beverage center” ended up being the perfect little nook for it. I also like the way the marble looks with the other materials and colors in the kitchen. A couple things about this, though:
- Cost – It’s about $39/sqft, so not particularly cheap. I only had about 4.5 sqft to cover, but it would have been an easy place to save a couple hundred dollars.
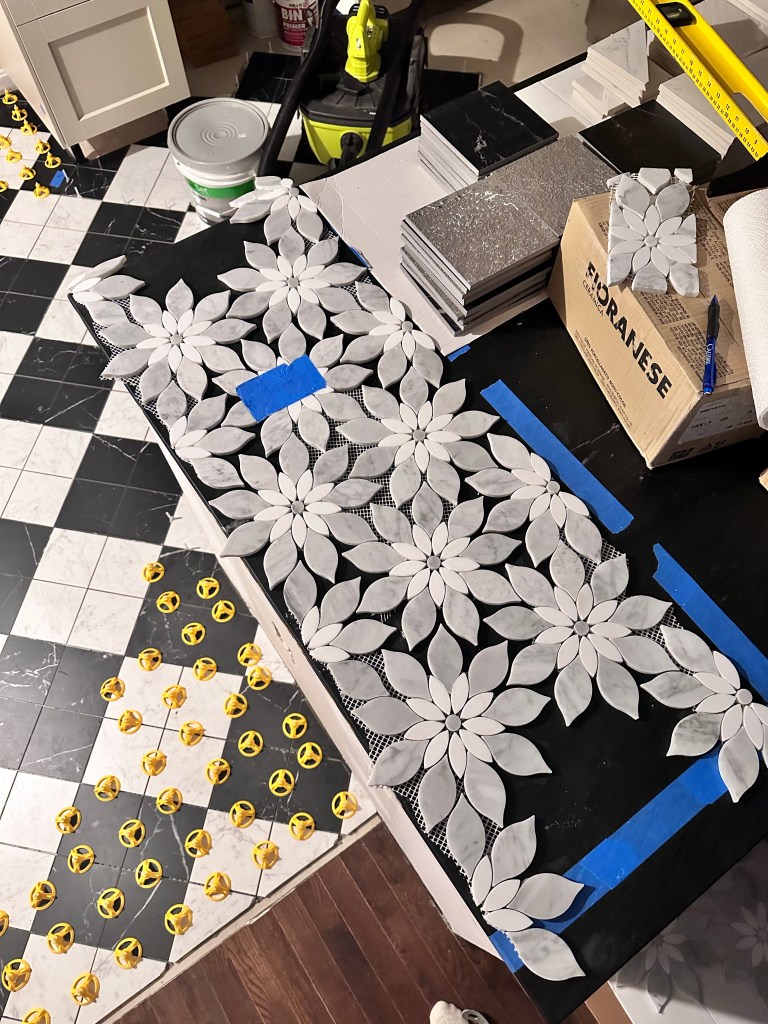
- Layout – The mosaic itself is a weird shape, so I taped-off a section of the countertops the same dimensions as the backsplash area to figure out the layout and mark the cuts. This included accounting for the one outlet on the wall there that would have to be cut around.
- Cutting marble – Can’t be scored-and-snapped, but otherwise was surprisingly easy with the diamond-tip wet saw.
- Install – Unlike most mosaics, this one consists of relatively little pieces swimming in an ocean of grout. It’s on a mesh backing, but the little cut pieces around the edges of the space and outlet cut-out still needed to be arranged separately.
- Grout – Initially, I wasn’t sure what color to go with. I used a medium gray for the floor tiles so I thought it would be nice to tie into that with the same colors, but that would have really blended in a lot of the petals … ultimately (and with the help of another sister-created rendering), I just went with a bright white to let the pattern stand out as much as possible. But also, since there was so much of it, it was super difficult to clean-up the wet install without basically constantly wiping more grout onto the tile.


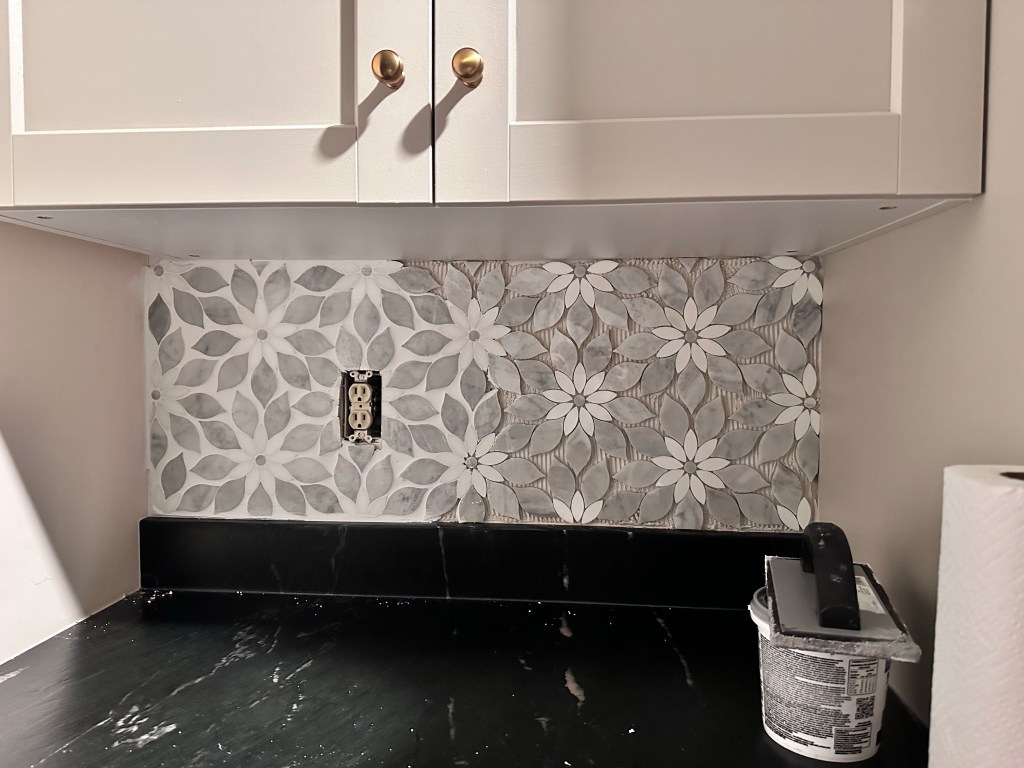
Now that it’s installed, the grout definitely isn’t perfect, but ultimately I’m really happy with how this little project turned out – I’m glad there’s something extra that’s cute and special in this one little corner, and it was well worth the effort, cost, and risk to fingertips while using the tile saw.
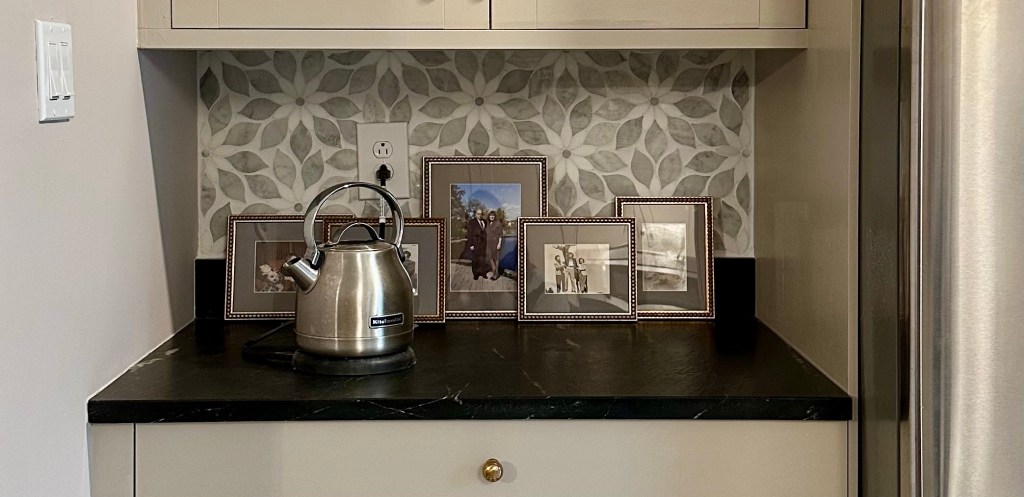
I also ended up using it as a place to keep a bunch of family photos I had gotten framed to originally use on the staircase wall. They’re all pretty petite, so this ended up being the perfect spot!
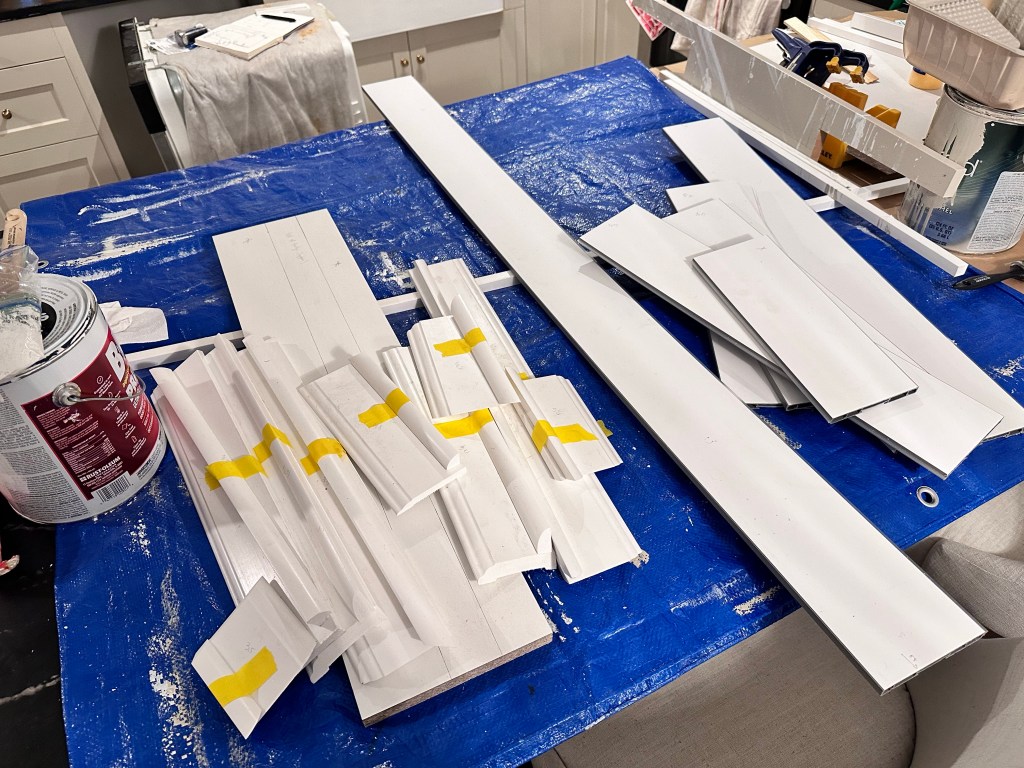
Cabinet Trim
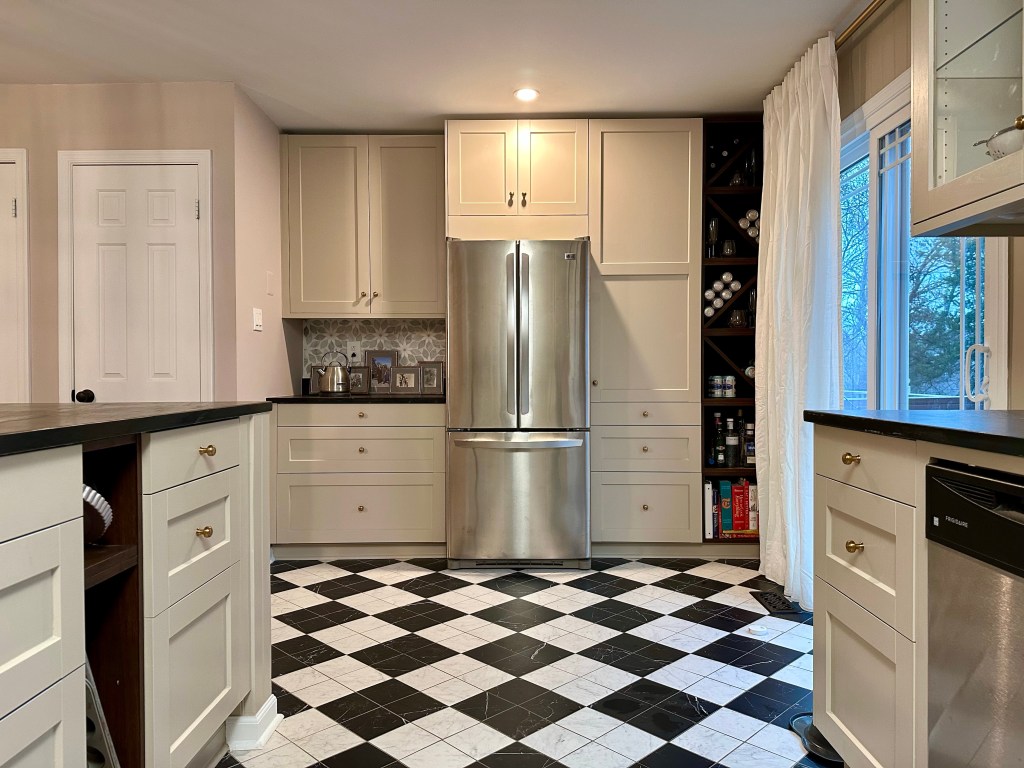
This was the biggest task I had leftover – all of the IKEA cabinets consist of one white cabinet box, plus doors or drawers in the chosen finish to cover the front. For cabinets where the side is going to show, like the ones that go either side of the sink, you then install a cover panel in the same finish. For cabinets that end at a wall, you leave about 2″ gap (so a door can swing open without the handle hitting the drywall), and fill with a filler piece that has to be custom-cut for the exact dimensions. I also needed this on either side of the sink base cabinet so I could center it on the window, and to trim around the farm sink itself. The upper corner cabinet I bought also turned out to be … just two smaller cabinets that you have to trim yourself to look like one piece. I also needed trim to fill-in around the dishwasher (and to secure the dishwasher to, since you can’t screw it into soapstone). And, one final piece to fill in the space above the fridge.
There’s optional trim for around the bottom of the upper cabinets, as well as crown molding around the top of the uppers. I said yes to the trim around the bottom to hide under-cabinet lighting, which was a good suggestion from the IKEA person who helped me with the original layout, but passed on the crown.
Lastly, there are toe-kicks for under the base cabinets – IKEA’s version comes in limited colorways and is supposed to clip on to the front of the cabinet feet. I found this worked really poorly, at least in my case – if your floors aren’t perfectly level, like mine aren’t, you could end up with gaps in some areas, and even if not, just snapping a long plastic piece into place you’ll still feel the flimsiness every time you kick it. I also found it hard to secure two pieces together at outside and inside corners. I ended up using them, but adding a but of extra structure behind with some spare molding, and also installing baseboard and shoe-molding – that covered any gaps and made the toe-kicks feel more substantial, and (added bonus) made everything look a little more ~fancy~.
I don’t have a table or miter saw, so all of this was just a lot of careful measurements, driving to my parents’ house to borrow their tools, and then cramming everything back into my clown car to bring home and install. Installation itself was fairly easy – for filler pieces, essentially a square piece of 5/8″ x 5/8″ trim glued and nailed to the side of the cabinet frame, and the trim glued and nailed to the front of that so it’s flush with the cabinet doors or drawers. (When you open the door or drawer however, you can see that edge of the filler piece, so need to make sure that’s finished.) And, since the dishwasher ended up sitting a little further back in it’s cavity than I expected, I also had to “box-out” some extra trim on either side to make sure you’re still seeing finished pieces when the dishwasher door is open. (Another good tip from the IKEA layout guy, this also helps reinforce the trim so when you slide the dishwasher out one day, it doesn’t just rip all the trim out with it.) Then, everything caulked and painted, which is the fun part!

Electrical

So, I didn’t end up installing the IKEA under-cabinet lights after all, as they’re designed to just be plugged in to outlets and I didn’t want to permanently cede three existing outlets to lighting (and didn’t plan ahead to get more outlets put in). Instead, I just got some battery-powered lights from Amazon.
Speaking of outlets, as with the rest of the house, all the outlets and switches were swapped for fresh, clean, white ones (including the ones that someone had previously just painted white). Shout-out to my dad for continuing to help with this never-ending task. I even remembered to write the circuit breaker numbers on the inside of the switch covers! And, the kitchen got it’s very first GFCI!
Lastly, after the boob lights exited, the light on one side became a pot light and the light on the right side became first a track light, and then secondly just a simple semi-flushmount drum. Classic and simple and doesn’t compete with the chandelier in the dining room, but provides plenty of light for the space.
Final Touches
The ultimate final touch was … the dishwasher! Yes, I lived for an entire year doing dishes the old fashioned way – first in the powder room sink, then in the lovely big farmhouse sink, and it actually wasn’t that bad. But, I suspect dishwashers are good for resale value.
Then, it was a lot of touch-up paint. Almost everything (cabinets, walls) was all in Shiitake, and I ended up blending the baseboards and shoe-moldings around the cabinets in a bit by painting them that same color as well. The ceilings and trim on the walls was all white, and I touched-up the wall color from the dining room and under the breakfast bar in Angora. I’m still really happy with this color combination!
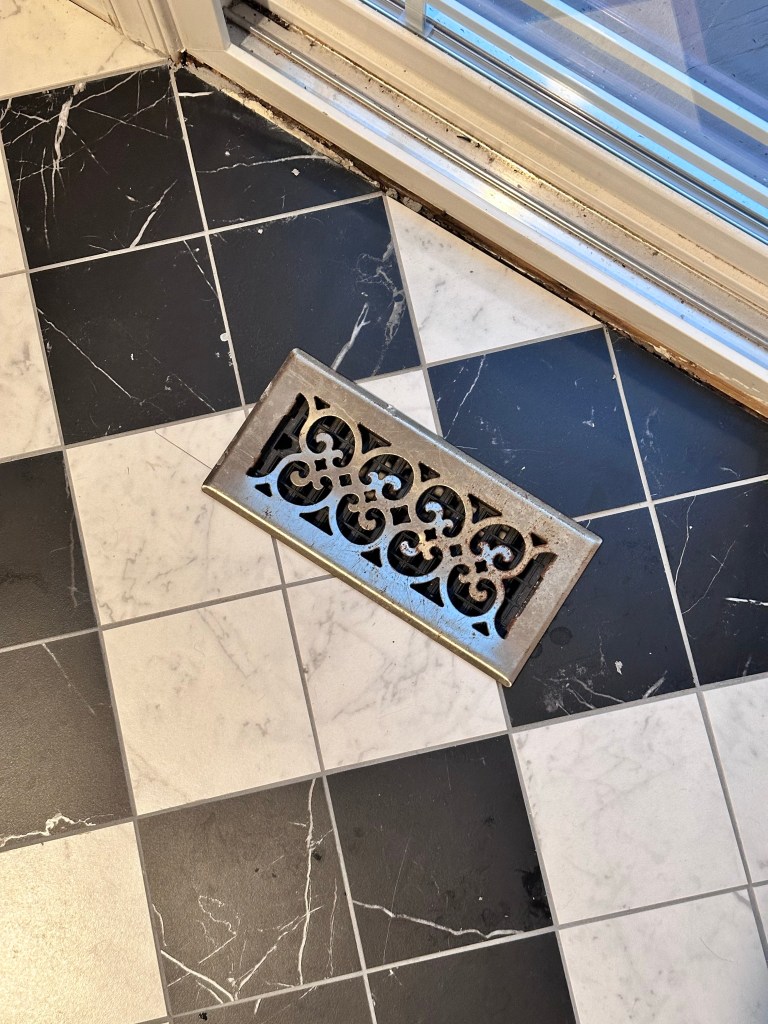
My favorite final touch is actually the HVAC register covers … they’re so easy to change out and, in my opinion, do as much as paint to make any space look new. I switched out the old, scratched, brassy-brass floor vent for the same pattern in a matte black, and the ceiling vent in fresh white. Two screws total and it makes such a difference!

Last step – curtains. Again, I tried a couple different options but am currently settled on a white linen. I also tried an off-white-and-black toile which I thought was really cute, but it was a) a little granny-chic, which is cool but I just spent a lot of time and money modernizing the kitchen, and b) basically Bluebell-camouflage.
(I originally thought moving-in would be the actual last step, but I basically moved in as soon as cabinet boxes went up since running up to a guest bedroom to get a plate is not super convenient. But, since I finished the kitchen in December, I still took the opportunity to add some poinsettias here-and-there, and of course clean.)

Grand Reveal
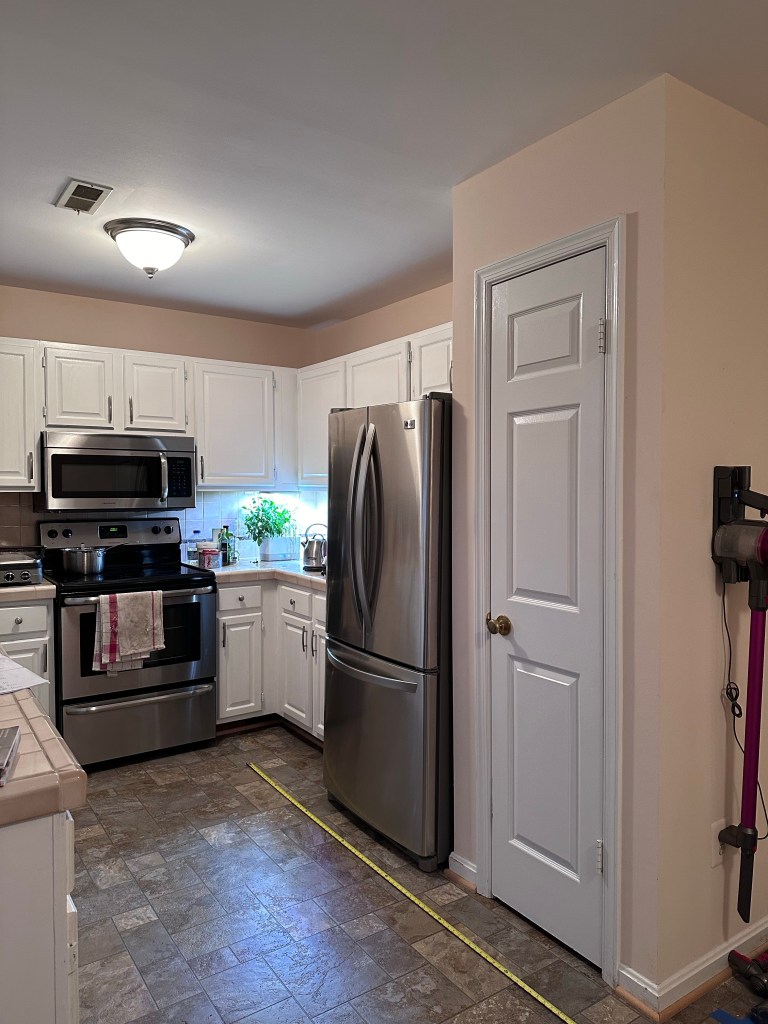
Here it is! Before …


And after …
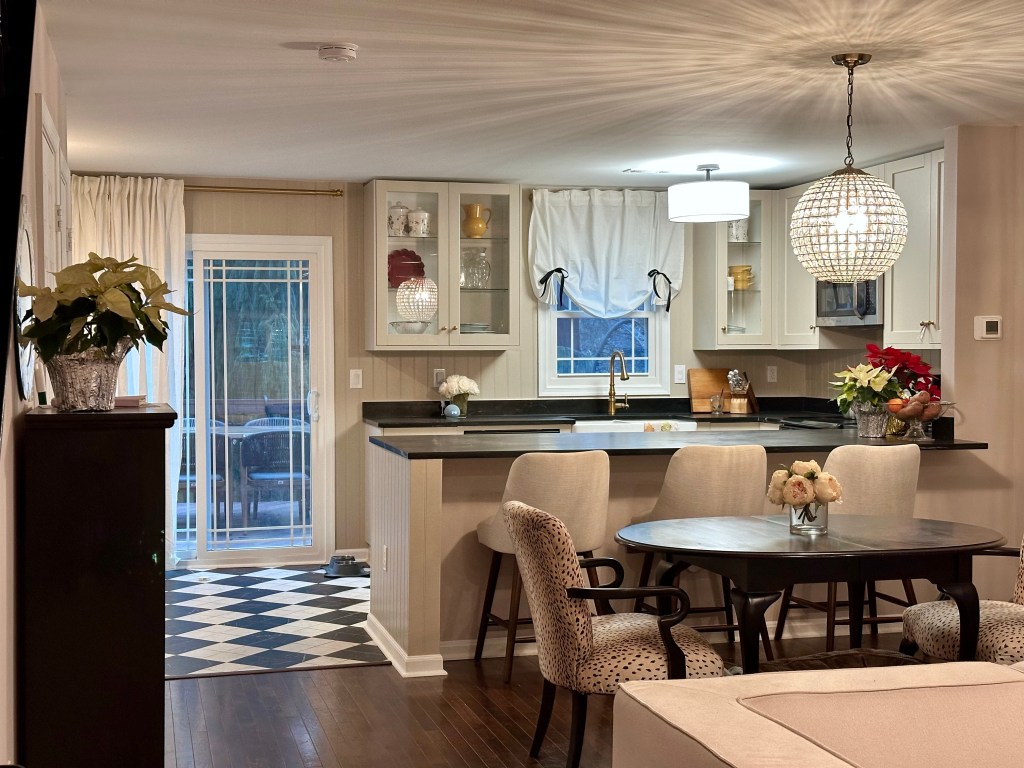
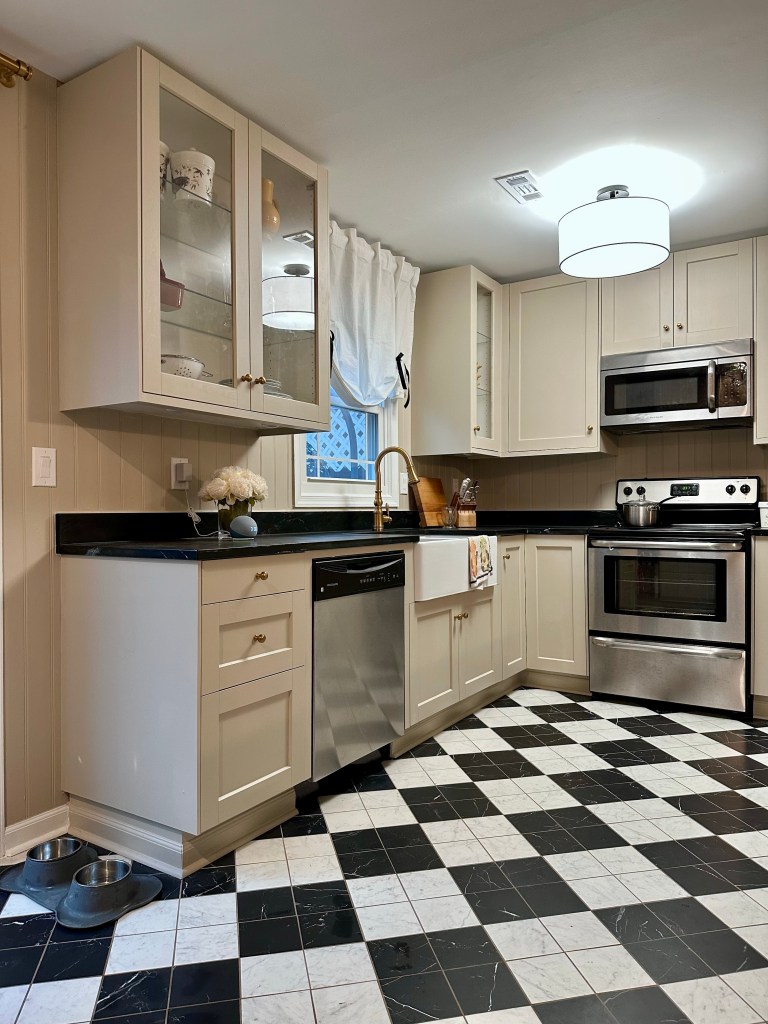
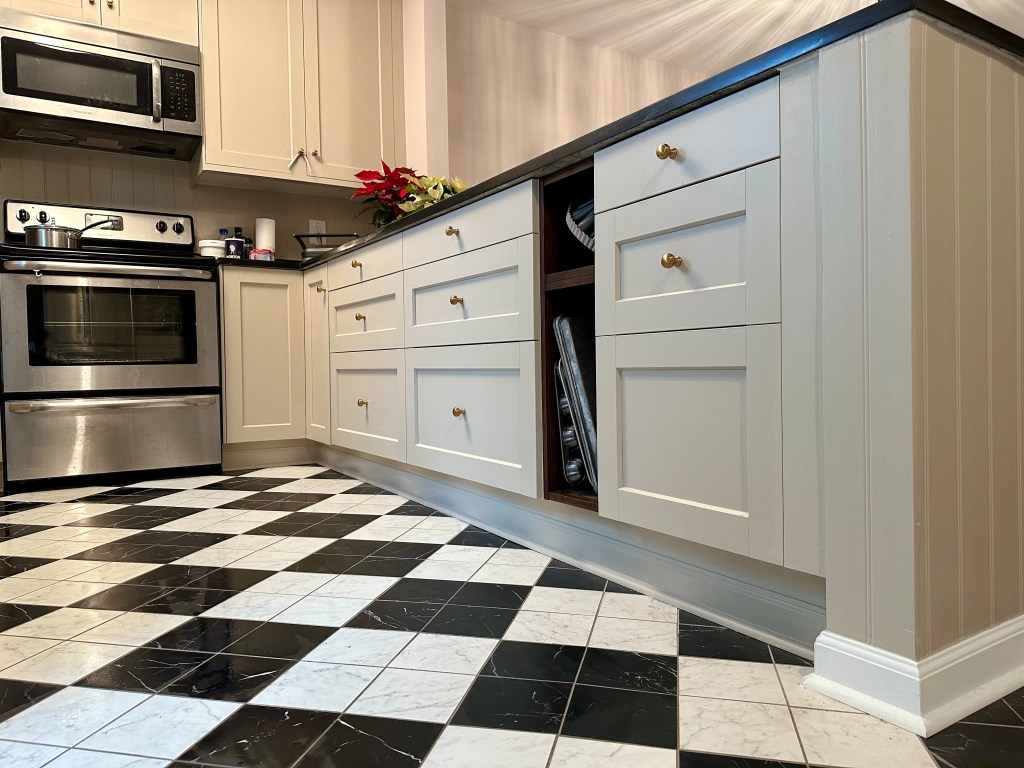
Some details …

Debits!
The original budget for the kitchen was $22,800. The final numbers came in at – drumroll please!
| Budget | Actual | Var. | |
|---|---|---|---|
| Cabinets | $8,150 | $2,690 | ($5,460) |
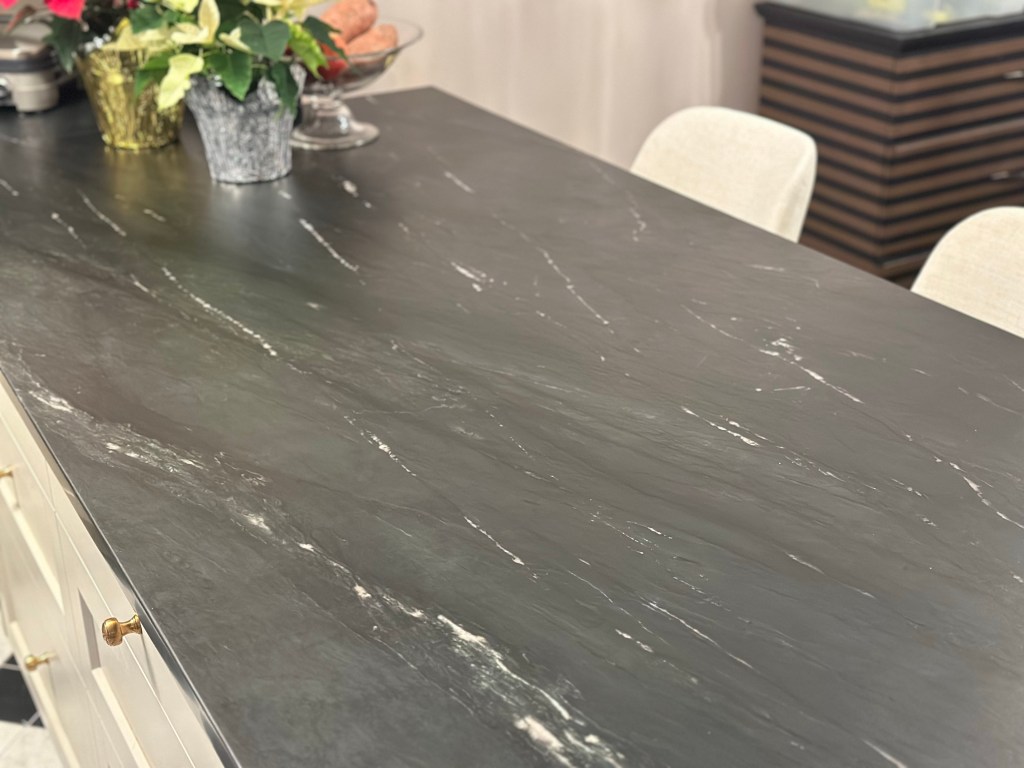
| Countertops | $6,000 | $5,144 | ($856) |
| Wall demo, dumpster fees, re-drywall | $2,785 | $2,785 | – |
| Floor tile | $1,500 | $1,506 | $6 |
| New window | $1,300 | $1,041 | ($259) |
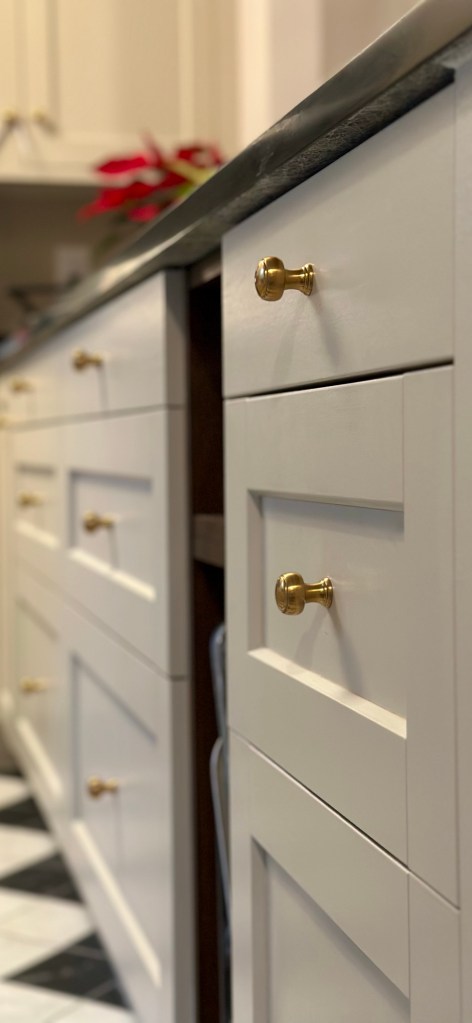
| Knobs | $770 | $903 | $133 |
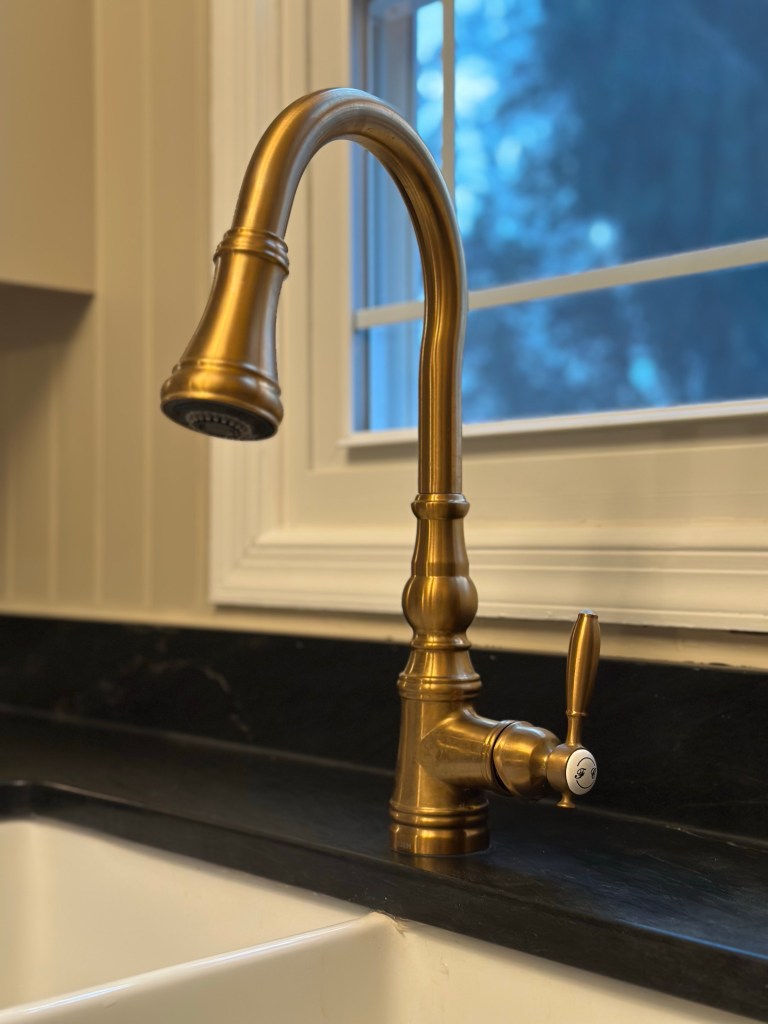
| Faucet | $520 | $521 | $1 |
| Sink | $300 | $295 | ($5) |
| Tile backsplash | $250 | $196 | ($54) |
| Contingency for random extras | $1,225 | $3,010 | $1,785 |
| Total spent on the Kitchen | $22,800 | $18,090 | ($4,710) |
Thanks in large part to all the confusion on IKEA’s part, I ended up almost $5k under budget, at just over $18k for the whole kitchen. There was no trick on the counters – I did shop around a bit, but that was mostly luck finding a material I liked, but that was less than expected. The window installers made enough silly mistakes that I negotiated the final price down a bit. On the other hand, I did spend a lot more at Home Depot ($2,228 of the $3,010 in “Extras”) on things like sub-floor materials that I hadn’t accounted for and buying pre-mixed rather than bagged thinset. And, the faucet was a fairly unusual shade of brass / gold, so I ended up paying a bit more than expected to get knobs that truly matched.
Total spent on The Kitchen: $18,090
Budget remaining (out of $50,000): $20,699
Final Thoughts
I wish I had something really insightful to say about all that I’ve learned about myself in this process, but I mostly don’t … I did find that almost everything, including the overall time frame, took about four times as long as expected. I’m also now hyper-aware of every little imperfection after spending months hunched over tiling projects and trim pieces, so it’s nice to get validation from neighbors and family members that it does in fact look okay. But, all-in-all I really enjoyed doing this, and would definitely look forward to doing it again someday.
Big ‘thank you’ again to my parents, who continue to lend me their stuff, provide advice, and help with such fun tasks as installing microwaves and hauling Hardie Backer through the house.
Next Time, on Debits & Design …
Now that the kitchen is done, we can catch-up on some of the other projects that have been going on in the background.
Thanks for reading!
